- Video compression reduces file size by balancing quality, codec, bitrate, and resolution according to the end use.
- HandBrake is a free, cross-platform transcoder that allows detailed control of video, audio, filters, and subtitles.
- Using MP4 with H.264 and appropriate bitrates for the resolution ensures good compatibility and quality on the web and platforms like Vimeo.
- Combining correct settings in HandBrake with modern codecs and good practices allows for significant space savings without excessively degrading the image.
If you work with video, sooner or later you'll run into the same problem: gigantic files that take up half your hard drive and are impossible to send or upload to the web. Learning to convert and compress video with HandBrake and other tools is practically essential these days, whether you create professional content or just want to share videos via WhatsApp or email.
Throughout this guide, we'll take a step-by-step look at exactly what video compression is, why it's so important, how codecs and formats influence it, and how to use HandBrake to reduce the size of your videos without them becoming blurry. We'll also review online alternatives, mobile apps, and some recommended settings for platforms like Vimeo or for 4K videos.
What is video compression and why is it so important?
When we talk about video compression, we're referring to the process of reducing the size of a video file while maintaining the highest possible quality . This is achieved using algorithms and codecs that eliminate redundant or less relevant information for the human eye.
In practice, there are two main types of compression that you should be clear about from the beginning, because they will determine the balance between quality and weight that you achieve:
- Lossy compression: It discards some of the image and audio information to drastically reduce file size. When properly configured, the loss of quality is almost imperceptible, but if you push the compression too hard, artifacts, blockiness, or a lack of sharpness will appear.
- Lossless Compression: It keeps all the original information intact; when decompressed, the file is identical to the original. The final file is barely reduced. compared to lossy compression, but it's ideal when quality is paramount.
Compression is used daily in a multitude of situations: saving storage space , meeting size limits on upload platforms, sending videos by email or messaging, or preparing content for streaming on the web.
In addition to saving space, compressing a video also improves upload and download speeds . A smaller file uploads to YouTube faster, sends more quickly via WeTransfer, and plays with fewer interruptions on slow connections—crucial if your audience is connecting from mobile devices.
In the field of streaming, proper compression is essential: services like YouTube, Netflix , or Vimeo rely on efficient codecs such as H.264 or H.265 to be able to serve video in real time without saturating bandwidth.
Codecs, transcoding and formats: just enough not to get lost
Before diving into HandBrake, it's helpful to clarify some concepts that frequently arise when discussing compression: encoding, transcoding, codecs, and file formats . Understanding these will help you choose the right settings and avoid compatibility issues.
On one hand, we have encoding in the strict sense, which is the process of converting an analog signal into a digital file . This would be, for example, digitizing VHS tapes to DVD or converting a cassette to MP3 . Here, you go from an analog physical medium to a file that you can save on your computer. There are also similar processes, such as converting a PowerPoint presentation to video, which follow similar rules when it comes to preserving quality and bitrate: converting a PowerPoint presentation to video.
Transcoding, on the other hand, occurs when you start with a digital file and convert it to another format or codec. Transforming an MP4 video into an MKV , or adapting a high-bitrate file for HLS streaming, are typical examples of transcoding (see our complete FFmpeg tutorial for editing and converting videos ). This is precisely what HandBrake does in your daily work.
At the heart of all this are codecs, which are the software (or hardware ) responsible for compressing and decompressing audio and video data . Each codec implements a standard: for example, x264 is a very popular implementation of the H.264 standard; x265 does the same with HEVC or H.265.
The choice of codec has a direct impact on two critical variables: final file size and perceived visual quality . Codecs like H.265 (HEVC) can offer similar quality to H.264 with a significantly smaller file size, but they require more processing power and are not as compatible with older devices.
File formats also come into play , acting as containers where video, audio, subtitles, and metadata are stored. Some of the most common are:
- .MP4: The most widespread format today; it supports codecs such as H.264 and H.265 and offers enormous compatibility with browsers, mobile devices, televisions, and online platforms. If you need to convert to MP4 in WindowsThere is a specific guide on How to convert to MP4 in Windows 11.
- .MOV: container closely linked to the Apple ecosystem; It works wonderfully on Mac, iPhone o iPadHowever, it is not so universal and may require additional software on other systems.
- .AVI: It's an outdated format that has become obsolete for HD and 4K videos; its compatibility with modern codecs and its efficiency are limited.
- .MKV: Ideal for high-quality content, Blu-ray rips, multiple audio tracks, and multiple subtitles. It's very flexible and powerful, although not as compatible with some older devices.
- .FLV: a format inherited from the Flash era; it was widely used for streaming, but It has been virtually replaced by MP4 on most modern platforms.
As a general rule, for general and web use, the MP4 + H.264 combination is the safest bet. For master copies or high-quality files that don't rely as heavily on immediate compatibility, MKV with H.264 or H.265 is a very solid option.
What is HandBrake and why do so many people use it?
HandBrake is essentially a free, open-source video transcoder , maintained by volunteers, that allows you to convert and compress videos from almost any input format to modern, widely used containers and codecs.
It's available for Windows, macOS, and Linux , with multi-threaded processing support to take advantage of multi-core processors. Its main purpose is to allow you to reduce the size of your videos , change their format, or adjust their parameters so they play smoothly on the web, mobile devices, televisions, or platforms like YouTube and Vimeo.
Among its strengths are:
- Compatibility with countless input formats: HandBrake will be able to analyze and convert virtually any video file you might have.
- MP4 and MKV output with modern codecs: primarily H.264 and H.265 for video, and AAC, MP3 or other common codecs for audio.
- Preconfigured profiles or “presets”: settings designed for YouTube, Vimeo, mobile devicesetc., which make life easier if you don't want to struggle with too many options.
- Advanced options for demanding users: Detailed control of bitrate, RF quality, filters, subtitles, multiple audio tracks, chapters, etc.
One very interesting detail is that HandBrake can also optimize files for the web , so that the video starts playing while it continues downloading, which is key if you plan to embed it on your page.
First steps: Install HandBrake and open your first video
The first thing you need to do is download HandBrake from its official website. There you'll find versions for Windows 10 or later, macOS, and Linux distributions. Installation is simple and straightforward , just like any other desktop program.
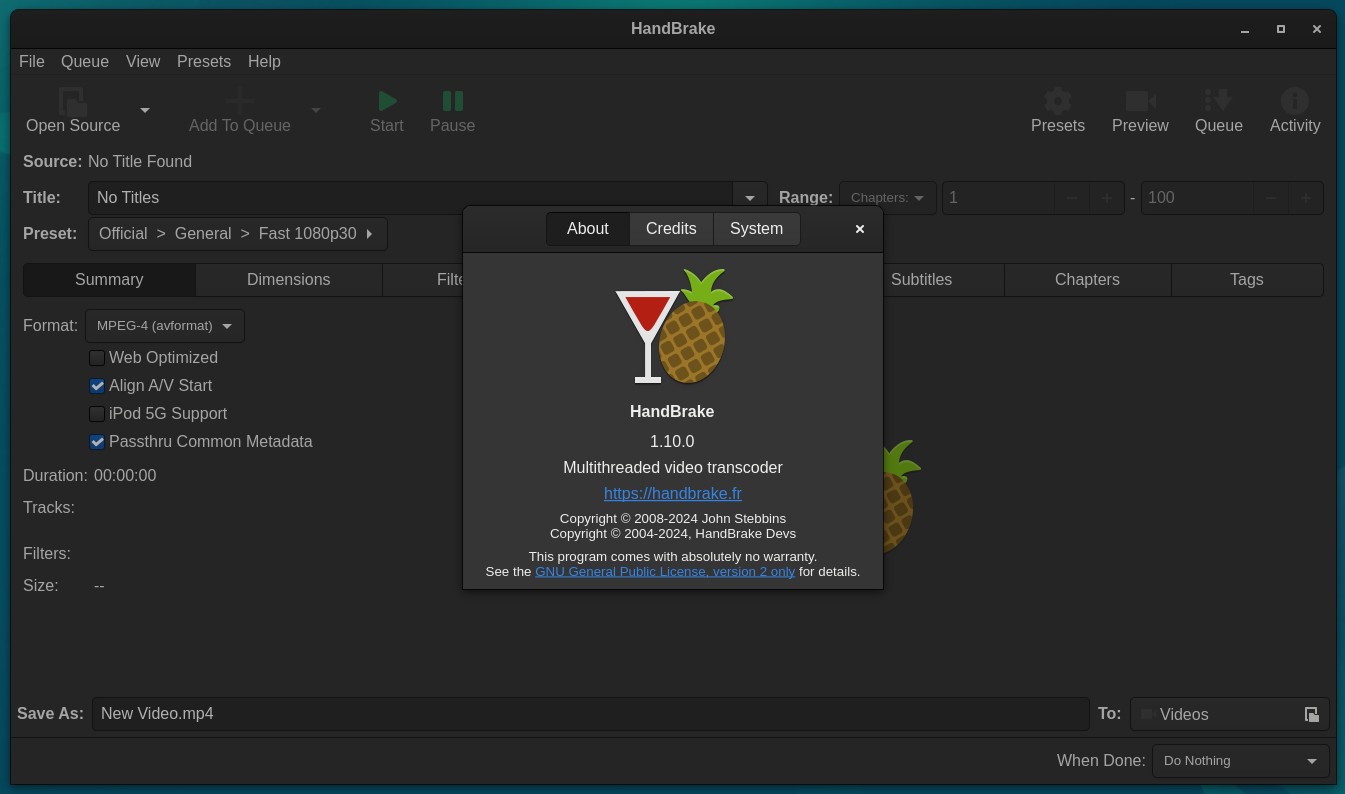
Once installed, open HandBrake. Upon launching, the program will usually ask you to select a source file. This will be the video you want to compress or convert. If you accidentally close this dialog box , you can also use the "File > Open Source" menu (or the "Open Source" button in the upper left corner) to choose your file.
After selecting the video and clicking "Open," HandBrake will analyze it for a few seconds . Then you'll see the basic information loaded in the "Summary" tab, and on the side, a series of presets you can use as a starting point.
At this point, it's worth noting that you have two approaches: use a preset almost as is for speed , or go through each tab individually and adjust video, audio, filter, and subtitle parameters to your liking. Ideally, you should start with a preset close to your target audience (for example, a profile for Vimeo or mobile devices) and then fine-tune it.
Presets and basic settings in HandBrake
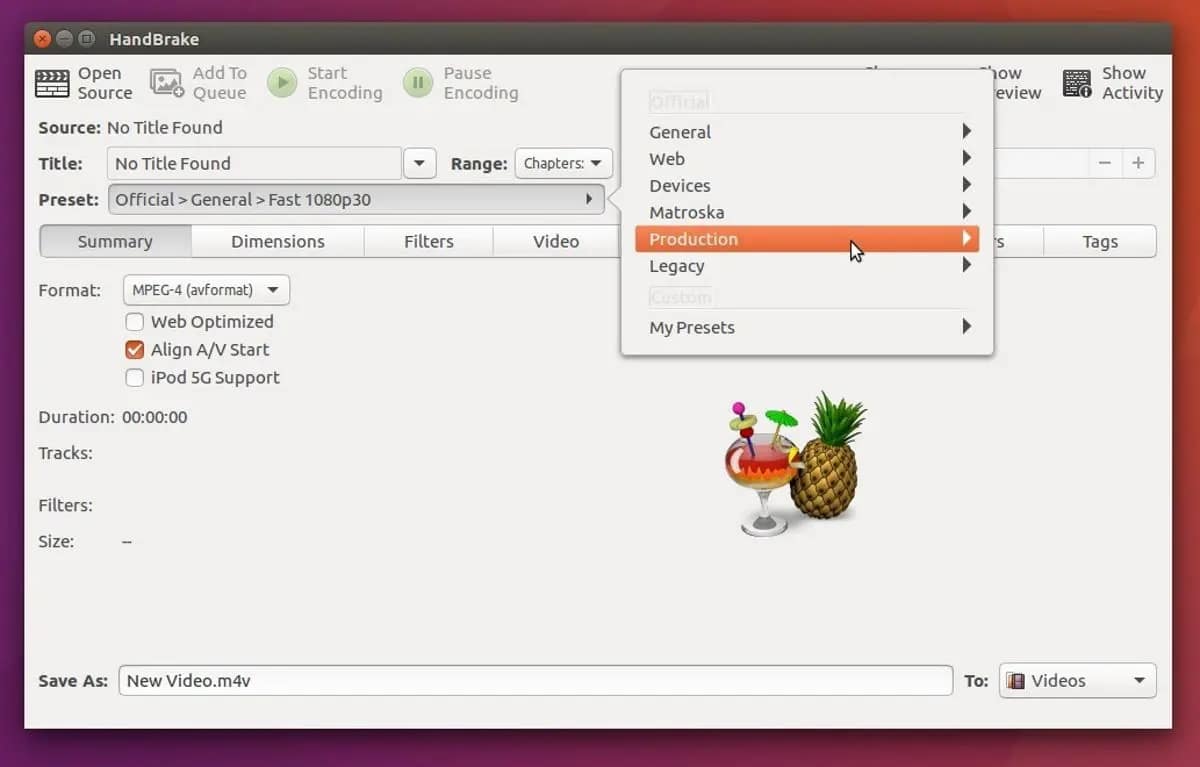
HandBrake's preset menu is one of its greatest allies when you're still learning. These predefined settings load a combination of codecs, resolutions, bitrates, and other parameters designed for a specific use: from Matroska 4K to profiles optimized for YouTube, Vimeo, or different mobile device models.
For example, if you know you're going to upload the video to a specific platform, you can choose a preset designed for that website and start from a proven base. If you then make any changes, the preset will be displayed as "Modified," indicating that it's no longer exactly the original configuration.
A very useful practice is, once you find the combination of settings that works best for you, to save your own custom preset using the “Save New Preset” button. This way, every time you open HandBrake, you can apply your favorite settings with a single click and only need to tweak minor details.
In the "Summary" tab, you'll see general file information: resolution, duration, source codec, etc. Here you also choose the output container, usually MP4 or MKV . For web-oriented video, MP4 is generally the best option due to its broad compatibility.
Within the "Summary" settings, you can also enable the "Web Optimized" option when working with MP4 files. This option internally reorganizes the file so that the player can start displaying the video without waiting for it to download completely; this is recommended if the destination is a website or streaming platform.
Controlling resolution and cropping: Dimensions tab
In the “Dimensions” tab, you’ll find everything related to video size, cropping, and aspect ratio. At the top, under “Source,” HandBrake displays the original file resolution , and just below that, you can define the output resolution.
If you're preparing a backup file or a master for archiving, you might want to keep the original resolution. But if your goal is to minimize file size without making the video look ridiculous , downsizing from 4K to 1080p or from 1080p to 720p can make a huge difference.
It's important to keep the aspect ratio preservation option enabled to prevent the video from becoming distorted. You'll also see settings like "Modulus" (usually set to 2) and automatic cropping, which detects black bars and can remove them to avoid wasting bits on areas with no information.
In many cases, simply leaving the default values, such as PAR 1:1 and automatic cropping, is sufficient. You'll only need to adjust the settings if you see black bars you want to remove or if you need to adapt the video to a specific format, such as a special frame for social media.
Filters: when to use them and when it's best to leave them alone
HandBrake's "Filters" tab offers tools to address specific issues with the source material , such as interlaced video, noise, unusual cropping, or poor sharpness. Using these tools is not mandatory, and in fact, it's best to activate them only when you know you need them.
Among the most common filters are deinterlacing options, designed for sources from television or older cameras that record in interlaced mode. If you're unsure what type of source you have, it's safer to leave deinterlacing disabled and consult a professional before turning it on.
You'll also find options for denoising and deblocking, which can smooth out compression issues in the original video. If used incorrectly, they can leave the video soft and lacking detail , so it's best to test them on small preview clips before applying them to the entire file.
Finally, there are rotation and grayscale conversion options. Rotation is only relevant if the video is upside down or flipped, and grayscale only makes sense if you want a black and white result for creative reasons.
Video parameters: codec, quality, and bit rate
Here's where it gets really interesting. In the "Video" tab, you decide which codec to use, the quality you want to achieve, and how the bitrate will be distributed throughout the video. This is where having even a basic understanding of the concepts really shows.
In “Video Encoder”, the most common choice is H.264 (x264), which combines good quality, efficient compression, and full compatibility with virtually any device and browser. For 4K, HDR , or even higher resolution content, you might consider using H.265 (x265) for even greater compression , provided your audience has devices capable of playing it smoothly.
Regarding frame rate, it's almost always a good idea to keep "Same as source" to preserve the original fps . If the source file has more than 60 fps, you can lower it to 60 or 30 to reduce file size; if it has less than 15 fps, you can increase it to a multiple between 15 and 30 for smoother playback.
Another key setting is choosing between a fixed bitrate (CBR), a variable bitrate (VBR), or a target average bitrate. To directly control the final file size, many workflows recommend setting an average bitrate in kbps and enabling two-pass encoding, which allows the program to better distribute the bits between simple and complex scenes.
For reference, these average bitrate ranges are usually used for reasonable quality on Vimeo and similar platforms :
- SD (480p): between 2.000 and 5.000 kbps.
- 720p: between 5.000 and 10.000 kbps.
- 1080p: between 10.000 and 20.000 kbps.
- 2K: around 20.000-30.000 kbps.
- 4K: from about 30.000 to 60.000 kbps.
- 5K or more: in the range of 50.000-80.000 kbps.
Use the lower end of the range for videos with low visual complexity (presentations, static shots) and slightly higher values for footage with a lot of movement, grain, or fine detail. Remember: lowering the bitrate too much will make the file smaller, yes, but at the cost of visible artifacts.
On the same tab, you'll find settings such as the encoding preset (faster, very fast, slow, etc.), the H.264 profile and level, and options like two-pass encoding. A "very fast" preset with two-pass encoding and a well-chosen bitrate usually offers a reasonable balance between render time and quality.
Audio and subtitle settings
It's not all about images: audio also takes up space, and fine-tuning it can result in further reductions without sacrificing too much. In the "Audio" tab, you can choose which track to keep, the codec, and the bitrate. If your file has several extra tracks that you don't use , it's best to disable them to avoid generating unnecessary data.
For general use, sticking with a codec like AAC at a 48 kHz sample rate and a bitrate between 128 and 320 kbps is more than sufficient in most cases. Stereo at 128 kbps works very well for online videos , while for more demanding projects you can increase it to 256 or 320 kbps.
If the video doesn't need sound, you can also leave the track set to "None" and remove the audio completely . This will save space and prevent unnecessary data uploads.
In the “Subtitles” tab, you decide whether to embed subtitles or keep them as separate tracks. MP4 only allows one subtitle track , while MKV supports multiple tracks. This is important if you plan to offer multiple languages embedded in a single file.
Choose destination, save, and launch compression.
Once you have all the parameters set to your liking, you just need to decide where to save the resulting file. At the bottom of the window, you'll see the "Save As" field, where you can enter the name of the output file and choose the destination folder using the "Browse" button.
It's important not to forget this step; if there isn't a valid path, HandBrake won't start encoding. A good practice is to create a specific folder for your compressed exports ; this keeps your workflow organized and prevents mixing original files with processed versions.
Once everything is ready, simply press the "Start Encode" button at the top. HandBrake will begin processing the video, and you can monitor the progress in the status bar . The processing time will depend on the length of the video, the resolution, the chosen codec, and your computer's processing power.
When the process is complete, it is recommended to open the resulting file in a player such as VLC or QuickTime and check that the image and sound are displayed correctly , without strange artifacts, unexpected silences, or A/V synchronization problems.
Practical example: compressing a 4K file for web and backup
Imagine you have a 4K video, about 44 seconds long, in MP4 format, with a resolution of 3480×2160 and a file size of 284 MB, fresh from your editing program. You want two versions: one to display online at 1080p and another to save as a 4K copy without it taking up a huge amount of space.
For the online version, you could lower the resolution to 1920x1080, keep H.264 as the codec, enable "Web Optimized," and set a bitrate of around 10.000-15.000 kbps, with AAC audio at 128 kbps stereo. With these settings, it's common to achieve reductions of over 80% compared to the original size without the average viewer noticing any loss of quality.
For native resolution backups, you can leave it at 4K, choose H.265 if your environment supports it, and slightly lower the bitrate compared to the original file. The result will be a smaller file than the master, but with very decent quality for storing on a hard drive or NAS without filling it up.
After rendering, comparing sizes and rendering times will help you better understand the impact of each decision. It's not uncommon to see the same 4K video compressed with good settings shrink to a fraction of its original size without, at first glance, appearing to have changed much.


Passionate writer about the world of bytes and technology in general. I love sharing my knowledge through writing, and that's what I'll do on this blog, show you all the most interesting things about gadgets, software, hardware, tech trends, and more. My goal is to help you navigate the digital world in a simple and entertaining way.