- Registering an application in Azure with Sites.FullControl.All application permissions on SharePoint ensures secure and centralized access to sites and documents.
- Creating managed identities in Dataverse and linking them to SharePoint using the sharepointmanagedidentity table consolidates Power Platform authentication.
- Configuring federated credentials in the Azure application allows Dataverse to exchange tokens with Azure AD using environment-specific subjects and issuers.
- Using PowerShell scripts to generate the subject identifier reduces errors and facilitates adaptation to different types of environments and sovereign clouds.
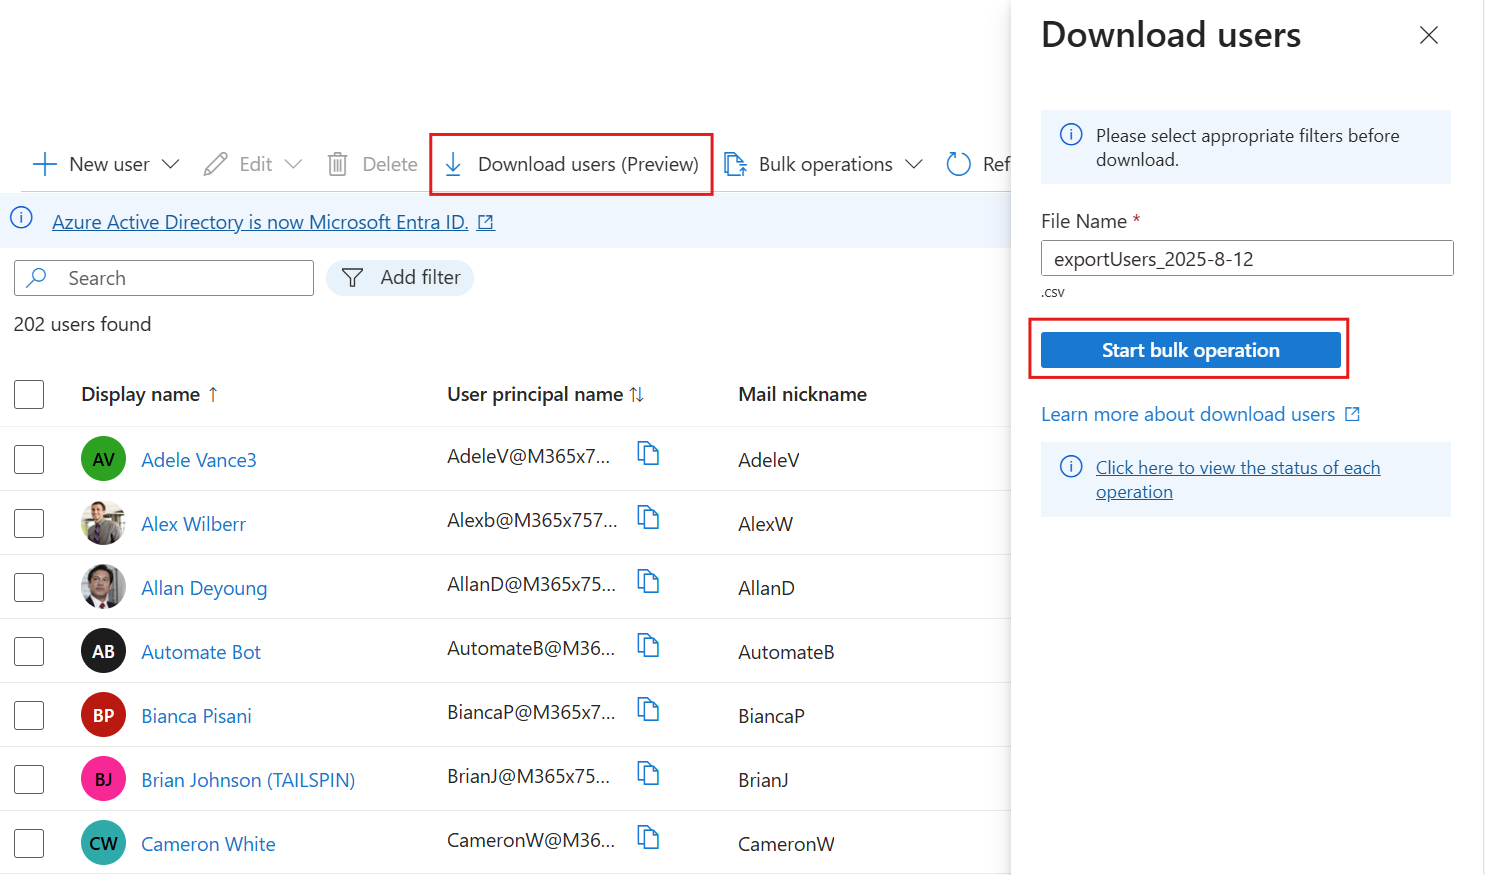
Working with Azure AD, SharePoint, and Power Platform increasingly demands more security and finer configurations than we're used to. When we want to automate processes like managing documents, integrating Dataverse, or preparing the groundwork for creating and managing users in Azure AD from SharePoint data, simply using the same old credentials is no longer enough.
Since March 2025, Microsoft has tightened the way SharePoint document tables are accessed from Dynamics 365 and model-driven applications , especially when accessed via Power Automate or Dataverse API calls. This means we need to use an Azure-registered application, managed identities, and federated credentials to continue working securely and without interruption.
Context: Why you need an Azure app to access SharePoint
When a business solution in Dynamics 365 or Power Platform uses the SharePoint document table , it often does so outside the traditional document grid of a model-driven app. This means accessing SharePoint through Power Automate flows, plugins, custom connectors, or direct calls to the Dataverse API, all of which require extensive permissions on sites and libraries.
Until recently, this access could leverage less stringent legacy mechanisms, but Microsoft has decided to remove that access in March 2025 to strengthen environment security. In practice, if you don't prepare the new configuration, you may encounter workflows that stop working, integrations that no longer read or write documents, or automations that start failing without warning.
The solution involves creating and configuring an application in Azure (Microsoft Entra ID) to act as a centralized identity for integrations, assigning it the appropriate SharePoint permissions, and linking it to Dataverse using managed identities and federated credentials . This will allow you to continue running automations that, for example, read SharePoint lists, manage documents, or even serve as the basis for processes that then create or manage users in Azure AD based on that information.
Registering an application in Azure with permissions on SharePoint
The first step in this setup is registering an application in Azure (Microsoft Entra ID) that will represent your automations when they need to communicate with SharePoint. This app will operate with application permissions (not delegated), so it can function independently of a logged-in user.
To begin, log in to the Azure portal with an account that has permissions to manage application registrations and Entra ID settings. Once logged in, go to the "Application Registrations" section , usually found within Microsoft Entra ID or directly under "Azure Services." This is where you'll create the identity that Dataverse will use to access SharePoint.
Click "New registration" and give the application a recognizable name so it's easy to identify it as the one handling authentication with SharePoint (for example, something related to Power Platform or the organization). In the "Supported account types" section , select the option that restricts access to "Accounts only in this organizational directory ," since the app will be working within your specific tenant.
After completing the wizard, tap "Register" to finish creating the app. On the registered app summary screen, in the "Basic Information" or "Essentials" section , you'll see two critical values: the "Application ID (Client)" and the "Directory ID (Tenant) ." These GUID identifiers will be key later for linking the app to Dataverse and configuring managed identities.
Note down and carefully save the application ID (clientId) and the directory ID (tenantId) , as you will use them both when creating the managed identity records in Dataverse and when defining the federated credential that will generate the correct token for SharePoint.
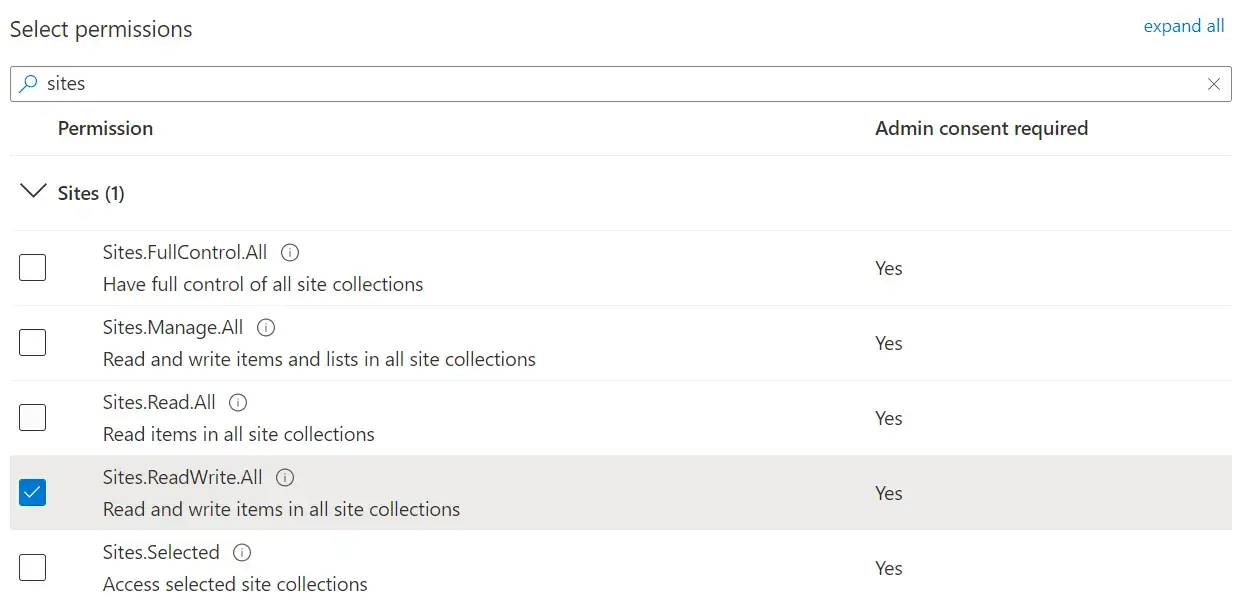
Next, you need to grant the application the appropriate permissions for the SharePoint API . In the app's navigation menu, go to "API Permissions" and select "Add a Permission ." Choose the SharePoint service , and when prompted for the permission type, select "Application Permissions ," which allows the app to function independently without user interaction.
Within the list of available permissions, locate and select "Sites.FullControl.All" . This permission grants the application full control over all SharePoint sites in the tenant, which is ideal for scenarios where Power Platform intensively manages documents, folders, and metadata. Once selected, click "Add Permissions" to add it to the app.
With the added permission, the key step remains: granting administrator consent . On the same permissions screen, you'll see the option "Grant administrator consent for <tenant name>" . Perform this action with an account that has global administrator privileges or similar, so that the SharePoint permission becomes active and the app can use it in production.
Creating managed identities in the Dataverse
With the Azure app ready and the correct permissions on SharePoint, the next step is to connect that identity to Dataverse using managed identity records . This allows the Power Platform environment itself to use that app to generate tokens and securely access SharePoint.
The process involves creating records in Dataverse's internal tables, specifically the "managedidentity" table , which represents each managed identity associated with an environment. You can do this using the Dataverse web API , leveraging tools like Postman, Insomnia, or any HTTP client that allows you to send authenticated requests.
In the table managedidentity You will need to insert a new row with a series of specific fields. The field applicationid must contain the GUID of the Application ID (client) that you obtained when you registered the app in Azure. Meanwhile, the field tenantid will store the GUID of Directory ID (tenant) from the same application record.
In addition to these identifiers, there are other configuration fields that determine the credential type and scope. credentialsource you must set the value 2, which indicates a managed credential source (IsManaged) via the platform. In the field subjectscope The value should be used 1, which corresponds to a EnvironmentScope type scopeThat is, linked to a specific Dataverse environment.
The HTTP request to the Dataverse web API will take the form of POST to the URL [Organization URI]/api/data/v9.2/managedidentitieswith typical OData headers (e.g., Content-Type application/json, OData-MaxVersion 4.0, etc.) and a JSON body similar to this, adapted to your actual values:
POST [Organization URI]/api/data/v9.2/managedidentities
Content-Type: application/json; charset=utf-8
OData-MaxVersion: 4.0
OData-Version: 4.0
Accept: application/json
{
 "applicationid": "<appId>",
 "credentialsource": 2,
 "subjectscope": 1,
 "tenantid": "<tenantId>"
}
If everything goes well, the API will return a response. HTTP 204 No Content, accompanied by a header OData-EntityId which includes the URL of the newly created record. Within that URL you will see a GUID that corresponds to the managedidentityid, something like aaaaaaaa-0000-1111-2222-bbbbbbbbbbbbSave that identifier because you will need it to link it to the specific SharePoint managed identity.
Associate SharePoint managed identity in Dataverse
Once the managed identity base is created in the table managedidentity, it's necessary to link it to an entry of type SharePoint managed identity, who lives on the table sharepointmanagedidentityThis is the piece that explicitly connects Dataverse with the use of SharePoint through that identity.
To do this, you will need to insert a new row into the table. sharepointmanagedidentity using, again, the Dataverse Web API. Field uniquename It must contain a unique name within the environment, for example "new_ppmiforsharepointauth", which clearly identifies that this identity is intended for authentication with SharePoint.
In the countryside name You can use a descriptive and friendly label, such as "Identidad administrada para la autenticación de SharePoint" or similar, that allows you to quickly locate it using administration tools or scripts.
The most important thing is the relationship with the base managed identity record you created earlier. This is done using the link field. [email protected], whose value should point to the resource /managedidentities(<managedidentityid>), substituting <managedidentityid> by the GUID returned previously by the creation of the managed identity.
The request to the Dataverse web API would look something like this, again using POST But now against the table sharepointmanagedidentities:
POST [Organization URI]/api/data/v9.2/sharepointmanagedidentities
Content-Type: application/json; charset=utf-8
OData-MaxVersion: 4.0
OData-Version: 4.0
Accept: application/json
{
 "uniquename": "new_ppmiforsharepointauth",
 "name": "Managed Identity For SharePoint Auth",
 "[email protected]": "/managedidentities(<managedidentityid>)"
}
As before, the answer will be HTTP 204 No Content with the header OData-EntityId pointing to the new registration, for example sharepointmanagedidentities(bbbbbbbb-1111-2222-3333-cccccccccccc)That GUID is the sharepointmanagedidentityidwhich you will need to use when building the subject identifier for the federated credential in Azure.
Configuring federated credentials in the Azure application
With the application registered in Azure and the managed identities already created in Dataverse, the final major step is to configure a federated credential within the app's registration. This credential allows Power Platform to securely exchange tokens with Azure AD, using the relationship established with the managed identity and SharePoint.
To configure it, return to the Azure portal and access your Microsoft login ID . Within the menu, go to "Application registrations" and locate the specific registration you created to manage access to SharePoint. Open it to edit its authentication and certificate settings.
In the registry's side panel, go to "Certificates and Secrets ," and then to the "Federated Credentials" tab. There you'll find the "Add Credential" option , where you'll define both the issuer and the subject that will represent Dataverse.
In the "Scenario" field for the federated credential, select "Other issuer ," as you will be manually specifying both the issuer URL and the subject ID pattern. This gives you the flexibility to match the exact configuration required by Power Platform for SharePoint managed identities.
In the countryside "Transmitter" You must write a URL in the format https://login.microsoftonline.com/<tenantId>/v2.0, substituting <tenantId> by the GUID of Directory ID (tenant) from your Azure app. That URL represents the Azure AD token issuance point for your tenant.
The key field is that of "Value", where the subject identifier which will be used in the federated relationship. The expected format is a string of the type:/eid1/c/pub/t/<base64-encoded-tenantId>/a/<base64-encoded-appid>/Env/<orgid>/sharepointmanagedidentity/<sharepointmanagedidentityid>
In that structure, the tenantId encoded in Base64 URL-safe Is placed in <base64-encoded-tenantId>, and the Power Platform application identifier that acts as Managed Identity (a specific AppId provided by Microsoft) is also Base64 encoded in <base64-encoded-appid>. Furthermore, <orgid> is the GUID of the Dataverse environment or organization, while <sharepointmanagedidentityid> corresponds to the GUID of the entry created in the table sharepointmanagedidentity.
Once you complete this information, click "Add" to create the federated credential. From that point on, the Dataverse managed identity linked to SharePoint will be able to obtain tokens through this configuration, allowing external flows, plugins, or integrations to access the SharePoint document table in a controlled and secure manner.
Generating the subject identifier with PowerShell
Manually constructing the subject string for the federated credential can be quite cumbersome, especially since it involves encoding GUIDs to URL-safe Base64 while adhering to a very specific structure. To simplify this task, you can use a PowerShell script that automatically generates both the subject identifier and other relevant values.
The proposed script defines a function called GetSharePointManagedIdentifyConfig, which receives several mandatory parameters: the type of environment (EnvironmentType), the GUID of the SharePoint Managed Identity (SharePointManagedIdentityId), the tenantId and the EnvironmentId associated with the Dataverse environment where you apply the configuration.
Parameter EnvironmentType It must be one of the values recognized by the script: Public, Gov, GovFR, High, DoD, MoonCake, USNat o USSecEach of them is associated with a different combination of issuer URL and Token Exchange Resource URLbecause different sovereign clouds and regions use different authentication endpoints.
Within the script, an internal function is declared called Convert-ToBase64Url, which is responsible for transforming a GUID into its encoded version in Base64 URL-safeThe procedure converts the GUID to a byte array, encodes it to Base64, and removes padding characters (=) and replaces the characters + y / by - y _ respectively, thus ensuring that the result is valid for use in URLs.
The script also defines a constant with the Power Platform Managed Identity AppId, 58e835ab-2e39-46a9-b797-accce6633447This is the identifier used by Dataverse for these integrations. This value is also passed through the Base64 URL-safe encoding function to fit the final subject string.
Environment configuration is managed through a list ($environmentConfigList) that assigns to each group of environments a IssuerUrl, an TokenExchangeResourceUrl or with a SubjectPrefixFor example, for environments of the type Public, Gov y GovFR the emitter is used https://login.microsoftonline.com/ and a subject prefix /eid1/c/pub, whereas for environments of type High o DoD is used https://login.microsoftonline.us/ with a different prefix.
When you invoke the function GetSharePointManagedIdentifyConfigThis seeks the appropriate configuration according to the EnvironmentType provided, builds the Issuer URL concatenating the tenantId and the suffix /v2.0and encodes the tenantId and the managed AppId in Base64. With all that, it generates the subject string with this pattern:{SubjectPrefix}/t/{encodedTenantId}/a/{encodedAppId}/Env/{EnvironmentId}/sharepointmanagedidentity/{SharePointManagedIdentityId}
The function returns formatted output with the input data, calculated values, and finally, the subject URL for the federated credential configuration . This last value is what you must copy and paste into the "Value" field when creating the federated credential in the Azure app.
To use the script, first save it as GetSharePointManagedIdentifyConfig.ps1 and then you create a second script test.ps1 import it and provide the appropriate parameters. test.ps1 A hashtable structure like this is commonly used:
. .\GetSharePointManagedIdentifyConfig.ps1
$configInput = @{
 environmentType = "<environmentType>"
 sharePointManagedIdentityId = "<sharePointManagedIdentityId>"
 tenantId = "<tenantId>"
 environmentId = "<environmentId>"
}
GetSharePointManagedIdentifyConfig @configInput
When running test.ps1You will see an output with the input data, the encoded IDs, the calculated issuer, and the final result of the Subject URLThat final value is the one used in the federated credential; for example, something similar to:/eid1/c/pub/t/u7uqqgAAzMwREd3dIiLu7g/a/qzXoWDkuqUa3l6zM5mM0Rw/Env/a0a0a0a0-bbbb-cccc-dddd-e1e1e1e1e1e1/sharepointmanagedidentity/bbbbbbbb-1111-2222-3333-cccccccccccc
With this combination of an Azure app with SharePoint permissions, managed identities in the Dataverse, and carefully configured federated credentials , you have a robust foundation aligned with Microsoft's latest security requirements. From there, you can design workflows and solutions that leverage SharePoint lists and documents as a data source for advanced processes (including creating and managing users in Azure AD), knowing that authentication is well-resolved, scalable, and meets modern environment security requirements.

Passionate writer about the world of bytes and technology in general. I love sharing my knowledge through writing, and that's what I'll do on this blog, show you all the most interesting things about gadgets, software, hardware, tech trends, and more. My goal is to help you navigate the digital world in a simple and entertaining way.