
Do you want to know how adjust tables in WordWhen you add a table to your document Microsoft Word, if the table is not as wide as the page, the table will automatically align to the left side of the page.
If you prefer the table to be centrally located, Word includes a simple tool to move the table horizontally. Word also gives you the option to choose between wrapping the surrounding text around the table or placing the text underneath, to help your document achieve the look you want. Stay with us to learn the ways to adjust tables in Word
Instructions for adjusting tables in Word
As we mentioned earlier, here we will see the ways to adjust tables in Word. Let's see what they are:
You may be interested in reading about: How To Insert An Image In Word MS
Method 1: Adjust tables in Word (Basic)
- Step 1:: Open the Microsoft Word document that hosts your table.
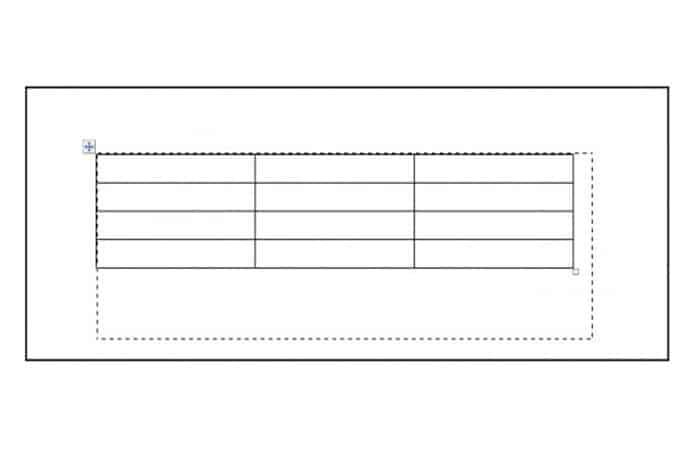
- Step 2:: Move your mouse over the table. You will see a small icon of two crossed arrows appear in the upper left corner of the table. Click this icon to select the entire table.
- Step 3:: Click on the “ tabDesigner» at the far right of the top of the screen. Look for the «Panel» from the ribbon and click the « buttonProperties» which is located there. A small window opens.
- Step 4:: Choose "Centro» under the heading «Alignment» to the center of your board horizontally. Directly below the «alignment» is the title «Text wrap«. Choose "None» to have the text below the table, or choose «around» to make the text wrap around the table.
- Step 5:: Click on «Accept» to close the window Properties from the table.
Method 2: Adjust tables in Word (resize)
One of the built-in features in Word is the ability to resize a table using the mouse. This is done in much the same way you would resize a picture.
- Step 1:: All you need to do is place the mouse pointer over the table. Word displays a small empty square in the lower right corner of the table.
- Step 2:: Click and drag this square to resize it as you like. When you release the mouse button, the table will resize.
NOTE: : Note that this technique does not modify the number of columns or rows in your table. Instead, it simply adjusts the height of each row and the width of each column so that the overall size of the table is the size you want.
Adjust row height and column width in Word tables
You can adjust the row height and column width in Word tables using the mouse. To do this do the following:
- Step 1:: Position the mouse pointer over the edge of the column or row to be adjusted. When you are in the correct place, the mouse pointer will become a double line with an arrow crossing it.
- Step 2:: At this point, click and drag to adjust the column width or row height.
NOTE: : In addition to the manual adjustments you make with the mouse, you can also use the commands in the button group «Cell size» from the « tabDesigner» from the contextual tab «table tools» Ribbon to adjust height. Rows and column widths.
- Step 3:: You can also use the button «auto adjust» to apply automatic adjustments to the selected cells.
- Step 4:: To do this, Select the cells you want to automatically adjust.
- Step 5:: Then click on the “ tabDesigner» from the contextual tab «table tools» of the tape.
- Step 6:: Then click on the button «auto adjust» in the button group » Cell size«.
- Step 7:: From the drop-down menu, select the adjustment method you want to apply. You can select “Automatically adjust content» to resize cells according to their content.
- Step 8:: You can select «Auto-fit window» to expand the table on the page to fit the window.
- Step 9:: Finally, you can select » Fixed column width» to manually set the column width using the techniques you just learned.
Method 3: Adjust tables in Word (Center a table)
By default, Microsoft Word 2010 Automatically aligns new tables to the left of your document. If you want to quickly center a table within the page margins, do the following:
- Step 1:: Right-click the table. Word displays a context menu.
- Step 2:: Choose Table properties on the context menu. Word displays the Table Properties dialog box.
- Step 3:: Make sure the tab Panel is selected.
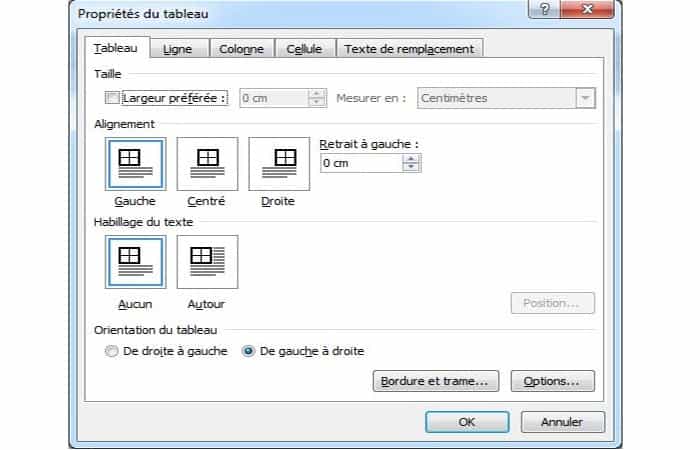
- Step 4:: In Alignment, Click on Centered.
- Step 5:: Click OK.
Way 4: Adjust tables in Word (Insert vertical divider line)
For some documents, you may need to insert vertical lines There are actually three or four different ways to do this in Word. The method you choose will depend on your needs and your documents.
The first method is to draw a line:
- Step 1:: Show the tab Insert of the tape.
- Step 2:: Click on the tool Forms, then click one of the available row shapes in the row group. The mouse pointer changes to a cross that looks like a big plus sign.
- Step 3:: Click on one end of where you want the line to be, but do not release the mouse button.
- Step 4:: Drag the mouse to where you want to place the other end of the line.
- Step 5:: Release the mouse button.
If you have multiple columns in your document and you want to insert vertical rows between columns, you can follow these steps:
- Step 1:: Select the text you want in the columns. (If you don't do this, your section or document will be formatted in columns.)
- Step 2:: Show the tab Designer of the tape.
- Step 3:: Click on the tool Columns in the group Page setup and then click More columns. Word displays the dialog box Columns:
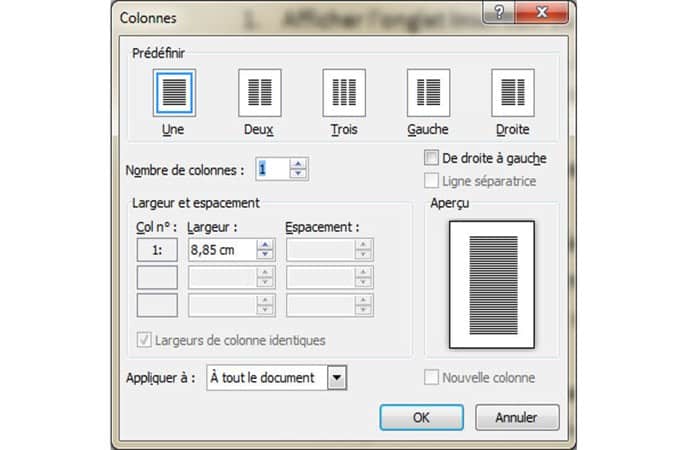
- Step 4:: Specifies the number of columns in which you want the text to be formatted.
- Step 5:: Make sure the check box is selected Line of separation between is selected.
- Step 6:: Click Accept.
The last way to create vertical lines is to use tables. While this may seem a bit complicated, it will work well for small sections of text. To use this method, follow these steps:
- Step 1:: Create a table that contains only one row, but as many columns as you want the text to be split into.
- Step 2:: Select the table.
- Step 3:: Make sure the tab is displayed Designer of the tape.
- Step 4:: Click on the tool borders(in the group Table styles ) and then choose Borderless
- Step 5:: Click the tool again Edges and then Select Vertical inner edges.
- Step 6:: Enter your text in each cell of the table.
You may also be interested in reading about: How to Create a Letterhead in Word – Complete Guide
Conclusion
As you can see, these are some of the ways you can use to adjust tables in Word. Each of these methods are useful when you need to modify the work tables according to your needs. We hope we have helped you with this information.
My name is Javier Chirinos and I am passionate about technology. Ever since I can remember, I have been interested in computers and video games, and that passion has turned into a job.
I have been publishing about technology and gadgets on the Internet for over 15 years, especially in mundobytes.com
I am also an expert in online marketing and communication and have knowledge in WordPress development.