
Would you like to learn about vectorization in Inkscape? Here we will explain everything that it involves vectorize in Inkscape as usual. In addition to that, you will learn some general interests of vectorization. We invite you to stay with us.
What is vectorization?
It is the action of transforming an image defined by colored dots (bitmap, i.e. a "standard" image) into an image defined by mathematical formulas called "vectors": lines, curves, etc. This tutorial will teach you how to vectorize in Inkscape easily.
Here you can read about: 8 Programs to Create Vector Images
Advantages and disadvantages of vectorizing in Inkscape
Advantages:
- You can scale a vectorized image almost infinitely, to any size you want, without loss.
- Images take up less space than bitmaps.
The drawbacks
- It is almost impossible to handle complex colors; therefore, vectorization is only suitable for drawing lines or coloring in flat areas (example: "traditional" comics (not modern complex coloring), manga without frames (you can put gray levels on the other side), etc.)
- You can forget about your vacation photos right away!
Method 1: How to vectorize in Inkscape?
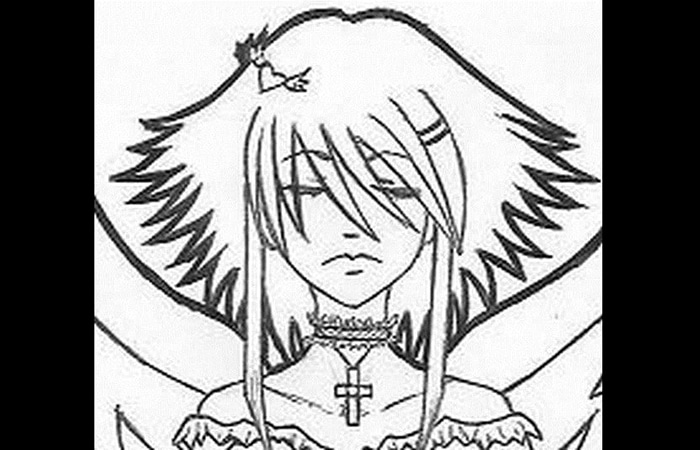
As an example, we will take this line drawing. As you can see, It is a drawing of “lines”: It is black or white, there are no grayscales, colors or screens.
Let's see his face:

Suppose you want this face, but three times bigger. What can you do?
Here is the face enlarged with the technique of "to the maximum«.

- Step 1:: So, let's try the best technique available in Photoshop, namely the so-called "bicubic«. This is what it gives:

It's confusing.
NOTE: : Photoshop does not properly enlarge this type of image. It is sad. What to do then? With the image viewer, called IrfanView, which has very advanced resizing filters, can be calibrated but still not vectorized.
Lanczos filter
Here is the face grown thanks to a "Lanczos filter«.
Unfortunately, although this filter is extremely effective in pictures perfectly clean and crisp, tends to amplify Jpeg compression artifacts.
B-Splines
Here is the face grown with the technique «b-spline».

It's much better, but suddenly... it looks blurry.
A thoughtful idea
Given the difficulty and poor quality of possible extensions, people have thought about it, and have thought something like this:
Since the whole drawing is made up of lines, can we find these lines and then enlarge them? Then we wouldn't have all these problems!
GoodYes, we can find these traitsThis process is called “vectorization,” and we’ll see how it works now.
Method 2: Vectorize in Inkscape
To do this, we download the software called Inkscape.
Why don't we use professional software, such as Illustrator? The reasons are as follows:
Download and install it. The installation takes a long time, which is normal.
During this time, save the full-size image of your face to a corner of your hard drive - you'll need it for testing.
The procedure for vectorizing in Inkscape
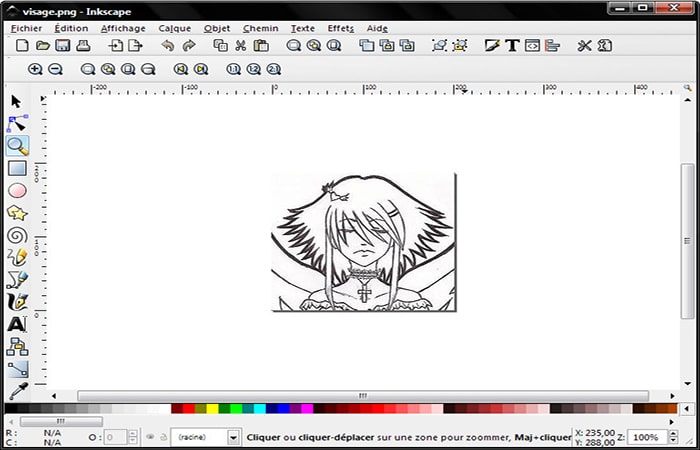
- Step 1:: Open it with Inkscape. You have every right to criticize the opening dialog, which is unfortunately an ergonomic monstrosity. You should get something like this:
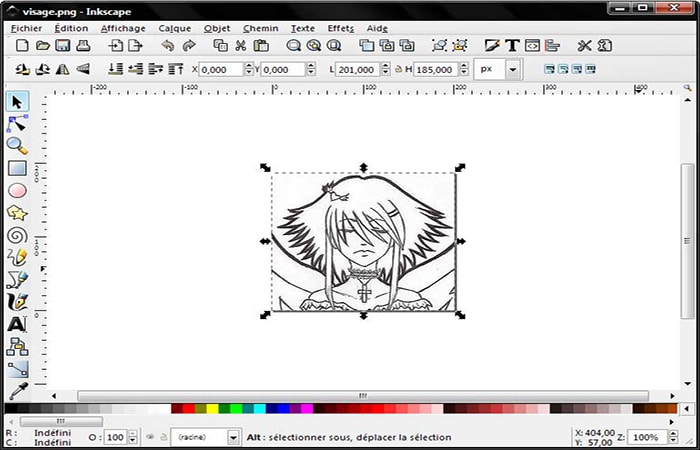
- Step 2:: Take the tool «selection» (the black arrow) and click on the image to select it:
- Step 3:: Then you must go to Route–> Vectorize Bitmap and we get a nice dialog box:
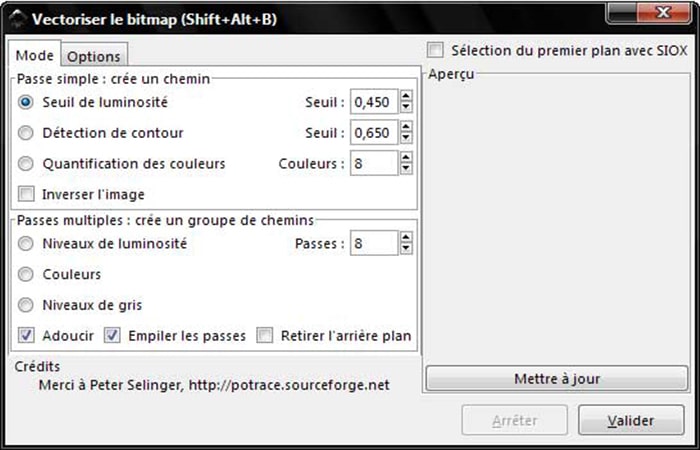
- Step 4:: We will use the first mode. Click on «to update» to preview the vectorization, then play with the brightness threshold.
NOTE: : Since there are many small details, we can go to the « tabOptions» to be able to preserve them.
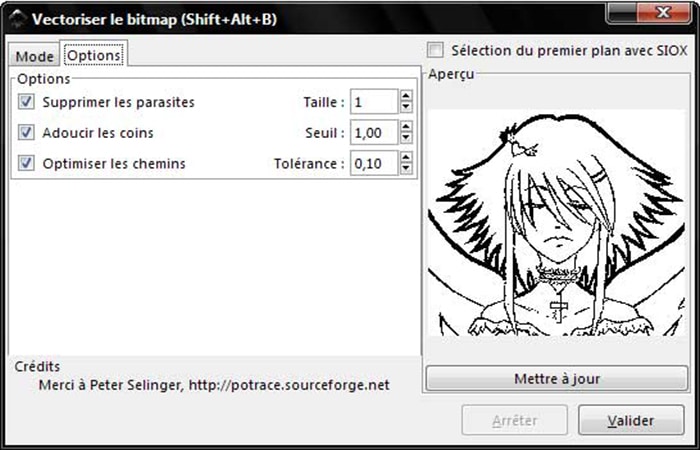
IMPORTANT: Inkscape is too much software, even. As a result, you can't put periods (they're not taken into account). Say goodbye to typing on the numeric keypad…
Without forcing it too much, and after a few attempts, you can find configurations that look good.
Personally and for this image, I like it with:
- Brightness threshold: 0.500
- Remove noise: 1
- Soften Corners: 1.00
- Optimize routes: 0.10
This all depends entirely on your image, so feel free to do lots of testing.
Anyway, to have something really “cleansed”, the image will have to be reworked.
Here is the vectorized image and the regular image side by side in Inkscape (by default they are superimposed, use the black arrow to move one, here the bitmap):
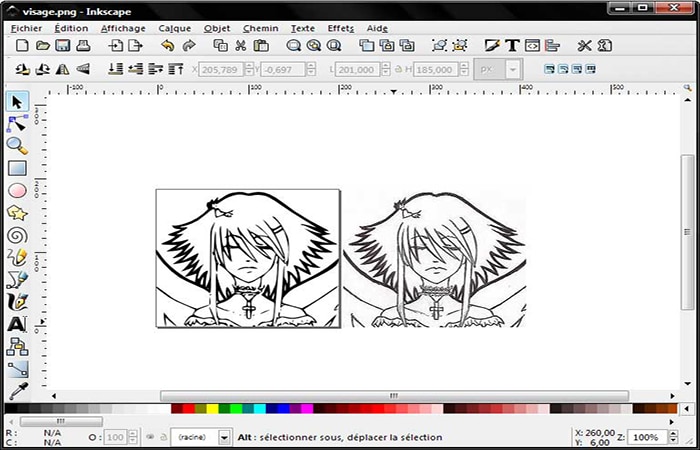
Notice that we have lost detail, especially on the neck or on very small things.
Now we can export our image as a bitmap, at any size we want, by selecting the image and clicking File –> Export Bitmap:
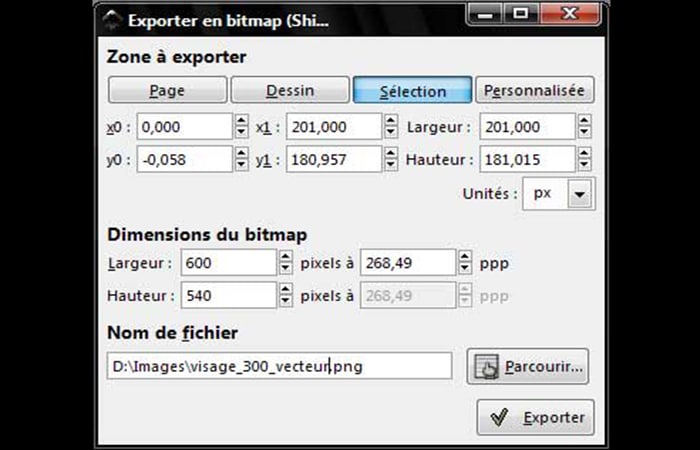
We are only interested in the part of "bitmap dimensions«.
Don't forget to click on «validate» to really export, and it is not the same "validate" to choose the name of the file.
This is what we get:
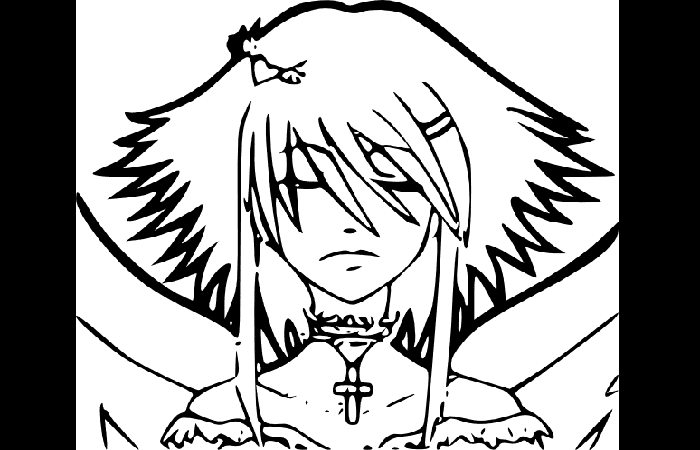
We could have done better by giving more details about the setup.
Parentheses about the format used by Inkscape
You can save Inkscape images in SVG format, which can currently be opened with Opera, Firefox, Chrome, Safari (but not IE), as well as OpenOffice, Gimp and many others.
Information for those interested in how things work
Did you know that XML is all the rage? Well, edit an SVG file with your favorite text editor… Surprise! It's XML! You can program your images in the console under Linux with VI or Emacs!
This choice offers four advantages:
- It is a standardized and open format, therefore stable in There and free implementation.
- The images obtained are compressed very well (there is even a project format compressed natively with GZip, the .svgz)
- We can recover a good part of a file if it has been damaged.
- You can make direct modifications to the XML file and thus manipulate the image with all the tools that manage XML. We can, for example, imagine a “dynamic table” in SVG + Javascript.
The big problem with this technique is that it quickly shows its limits. The image must be perfect, very black black on very white white, without details that are too small, without colours (and especially without gradients), etc.
Plus, you have to edit the image after the fact to get something perfect.
For this reason, it is interesting and useful to be able to vectorize any type of image in Inkscape.
Method 3: Vectorize in Inkscape by separating colors
Now, let's study an interesting feature of Inkscape software: Vectorization of a bitmap image by exploding colors by slices. The goal of the process is to vectorize an image while cutting it into several flat areas of different colors. We will see that this operation is almost automatic in Inkscape.
Sometimes it will take a few tries to find the right settings, but the color explosion itself is relatively simple.
Vectorize in Inkscape by separating colors
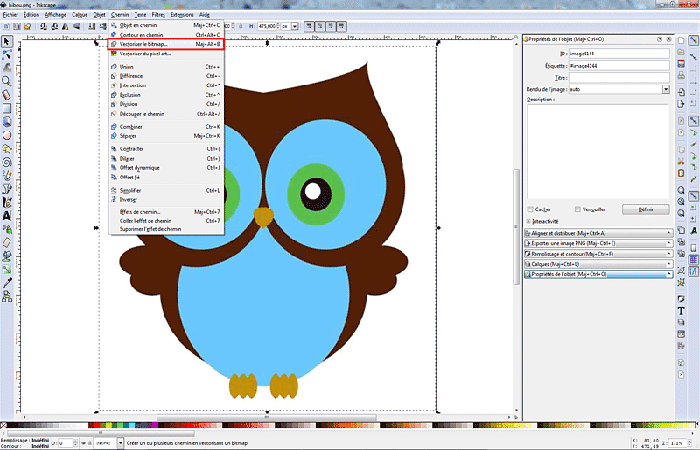
- Step 1:: Open your image in Inkscape.
- Step 2:: Vectorize it using the menu » Route " and then » Vectorize the bitmap«.
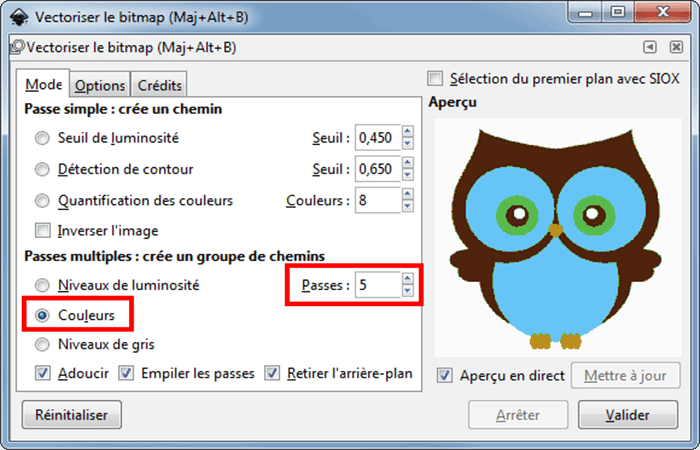
- Step 3:: Choose the option » Colours» and indicate the number of passes you want (use the live preview to determine the number of passes based on your desired result).
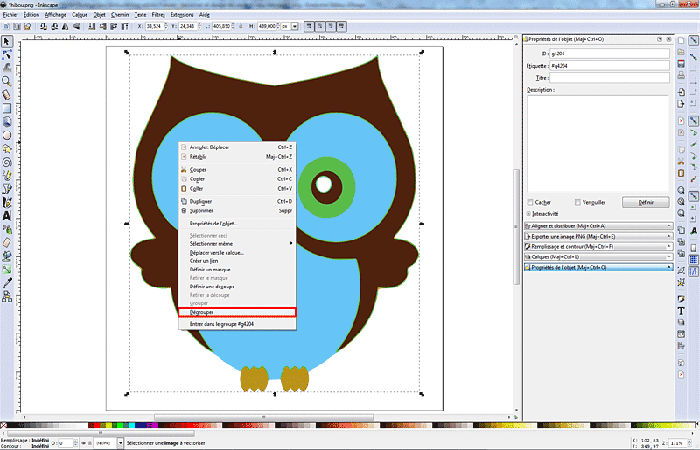
- Step 4:: Ungroup the result (right click and then «ungroup«) and eliminate useless solid colors (there will necessarily be some).
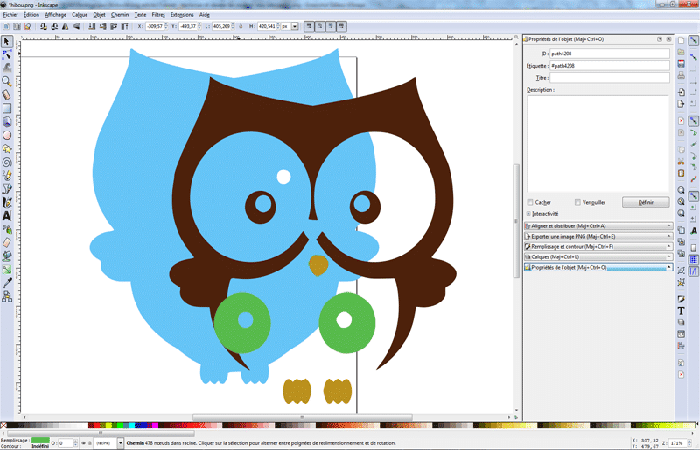
- Step 5:: Save your file in SVG format.
Method 4: Vectorize in Inkscape (pictogram)
This function will be used to take advantage of the vectorization result paths for its realization. If you expect to find an identical image, but in vector, you will be disappointed.
Ideally, this feature vectorizes dark silhouettes on a light background very well. There is an option to include color, but Inkscape will create as many layers as colors. You then end up with several objects stacked one below the other. Which can be complex to modify.
To vectorize a pictogram:
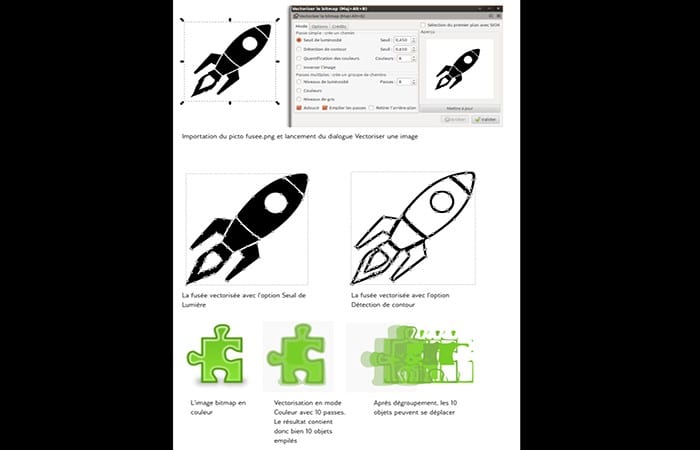
- Step 1:: Through the menu File > Import, import a simple bitmap image.
- Step 2:: Select the image with the tool Strategic.
- Step 3:: Run the convert command Chemin > Vectorize Bitmap.
- Step 4:: A dialog box appears allowing you to refine the options.
- Step 5:: When you are satisfied with the preview result, click Validate. The result is immediately visible on the canvas. It is located exactly above your image.
Let's go into detail about the options of this great tool. The first tab contains several Modes:
- Brightness threshold mode. Most commonly used, this creates a silhouette type path of a shape such as the pictogram.
- Edge detection mode. Useful if you only want to vectorize the outline of a shape.
- Color quantification. Useful if you want a colored result.
The option Multiple passes will allow for a much finer result, but will create as many objects as passes.
On the right side of the dialog box, don't forget to update the preview with each change and validate to get the result.
Method 5: Vectorize in Inkscape: Rasterize
Inkscape allows you to vectorize raster images, to make a path (element ) inserted into your SVG drawing. This method will help you get started using the tool.
Please note that the purpose of tracing with this tool is not to produce an exact duplicate of the original image, nor to produce a final result. No automatic vectorization tool can produce this. You will get a set of curves that you can use as resources in your drawing.
In general, the more dark pixels there are in the intermediate image, the more vectorization Potrace will generate. The more vectorization, the longer the processing time and the larger the resulting path. We suggest experimenting with this with fairly light intermediate images, darkening them as much as necessary to achieve the desired size and complexity of the resulting path.
- Step 1:: To use the vectorization tool
- Step 2:: open or import an image
- Step 3:: select it and run the command or press: Ruta ⇒ Vectorize raster object Shift + Alt + B
You will see three filter options available:
Brightness threshold
This option simply uses the sum of the red, blue, and green (or shade of gray) components of a pixel to determine whether it should be considered black or white. The threshold can be set between 0,0 (black) and 1,0 (white). The higher this threshold, the fewer pixels are considered “white,” and the darker the intermediate image.
Edge detection
This option uses the edge detection algorithm proposed by J. Canny, to quickly find isoclines of similar contrast. This produces an intermediate image that looks less like the original image than the result of a brightness threshold, but often contains curves that would otherwise be ignored.
The threshold set here (0,0 to 1,0) adjusts the brightness threshold to determine whether a pixel adjacent to a contrast curve should be included in the result. The setting allows you to adjust the darkness or thickness of the edges of the result.
Color quantification
The result of this filter will produce an intermediate image that is very different from that produced by the other two, but can also be very useful. Instead of looking for isoclines of contrast or brightness, it looks for the limits of color changes, even with constant contrast or brightness.
- The setting here, number of colors, determines the number of colors the intermediate image should have if it were in color.
- Then it makes the determination of white/black according to the even or odd index of the colors.
You should try out these three filters and observe the different results they produce for different types of images. For a given image, there will be one that will perform better than the others.
After vectorization, you should try applying the command to the resulting path, to decrease the number of nodes. This can make editing the Potrace output much easier.
- E.g., here is a typical example of vectorization of “Old Man Playing Guitar" Ruta ⇒ Simplify Ctrl + L
Note the large number of nodes in the path. After pushing, this is a typical result: Ctrl + L
The representation is a bit rougher, but the drawing is simpler and easier to edit. Note that what you need is not an exact representation of the image but a set of curves that you can use in your drawing.
Conclusion
As you can see, these are the best methods you can apply to vectorize in Inkscape. Each of these tips can be useful to you in the future, just remember to practice so that your work looks professional. We hope we have helped you with this information.
My name is Javier Chirinos and I am passionate about technology. Ever since I can remember, I have been interested in computers and video games, and that passion has turned into a job.
I have been publishing about technology and gadgets on the Internet for over 15 years, especially in mundobytes.com
I am also an expert in online marketing and communication and have knowledge in WordPress development.