- Bitwarden allows you to manage and synchronize secure passwords across multiple devices using a single encrypted vault.
- Proper configuration of the extension, password generator, and 2FA significantly enhances account security.
- It is possible to import credentials from browsers or other managers and even deploy Bitwarden on your own server with Docker.
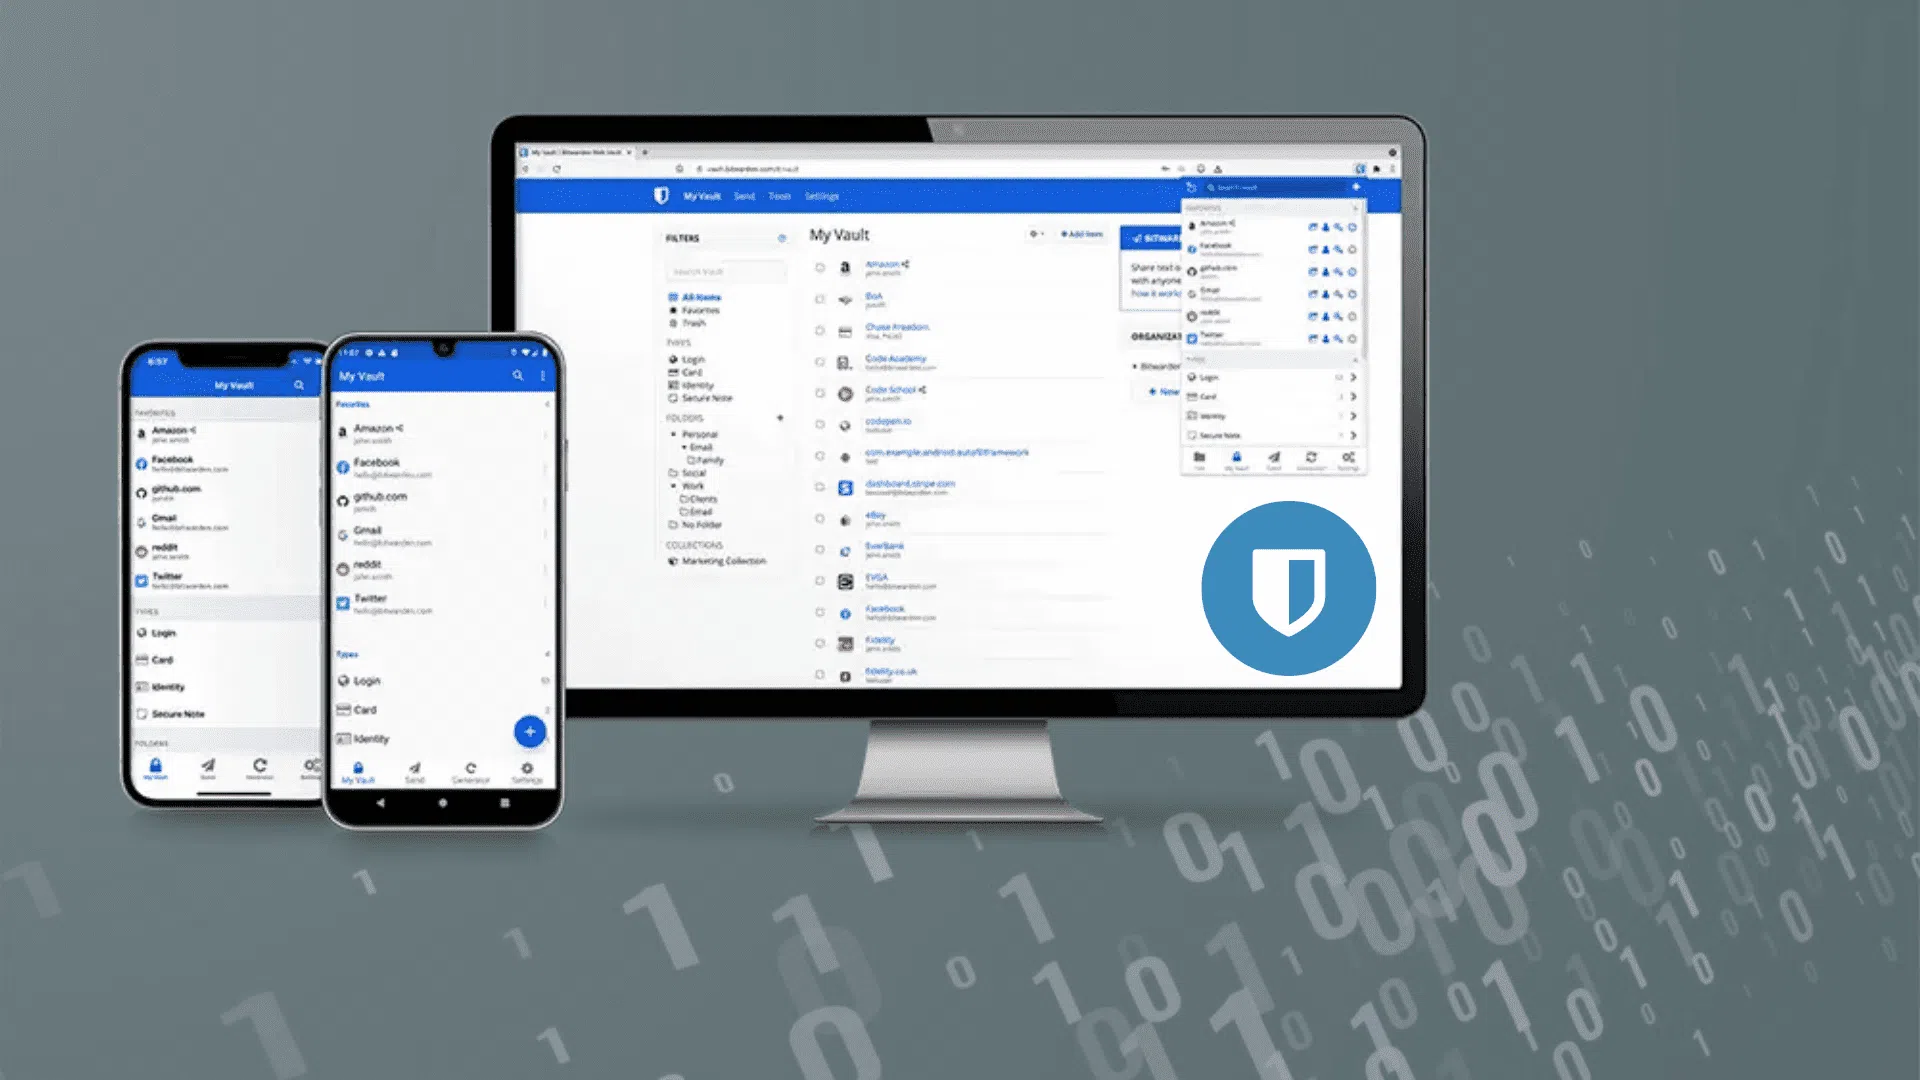
If you're concerned about the security of your online accounts but tired of memorizing impossible passwords, setting Bitwarden as your primary password manager is one of the best decisions you can make. This open-source manager lets you save, organize, and protect all your logins from any device, without limiting the number of passwords or the number of devices you can use it on.
In this comprehensive guide, you'll find everything you need to understand, install, and configure Bitwarden : from creating your account and web vault, to the browser extension and mobile app, to generating secure passwords, two-step login, and, if you want to go a step further, deploying Bitwarden on your own Windows server with Docker. The goal is for you to have your password ecosystem completely under control by the end.
What is Bitwarden and why is it worth setting it up properly?
Bitwarden is a cross-platform, open-source password manager that you can use for free or through very affordable paid subscriptions to unlock some advanced features, such as certain 2FA options or family and organization plans with extras.
Their philosophy is based on storing all your credentials encrypted in a secure vault protected by a master password . This is the only password you need to remember, so it's crucial that it be long, complex, and known only to you. The rest of your passwords can be random, impossible to memorize, and different for each website.
One of its major advantages is that it works in virtually any environment : web applications, browser extensions, mobile apps for iOS and Android , desktop applications, and CLIs. Furthermore, being open source, there are alternative implementations like Vaultwarden , which is lighter and easier to set up on modest hardware (for example, a Raspberry Pi).
In terms of security, Bitwarden offers confidentiality, integrity, and availability of your login credentials. Everything is encrypted, and only you (with your master password or configured authentication factors) can unlock the information. However, to take full advantage of its potential, it's crucial to spend a few minutes configuring it correctly.
First steps: creating an account and accessing the web safe
The first step is to create a user account on Bitwarden . From the official website, you'll need to click on options like "Get Started" or "Create account," which will take you to a fairly simple registration form.
In this form, the crucial part is the Master Password field . It must be a very strong password (uppercase letters, lowercase letters, numbers, and symbols) but at the same time memorable enough that you can recall it without writing it down in unsafe places. You can use a long phrase with variations or a hint system that only you understand.
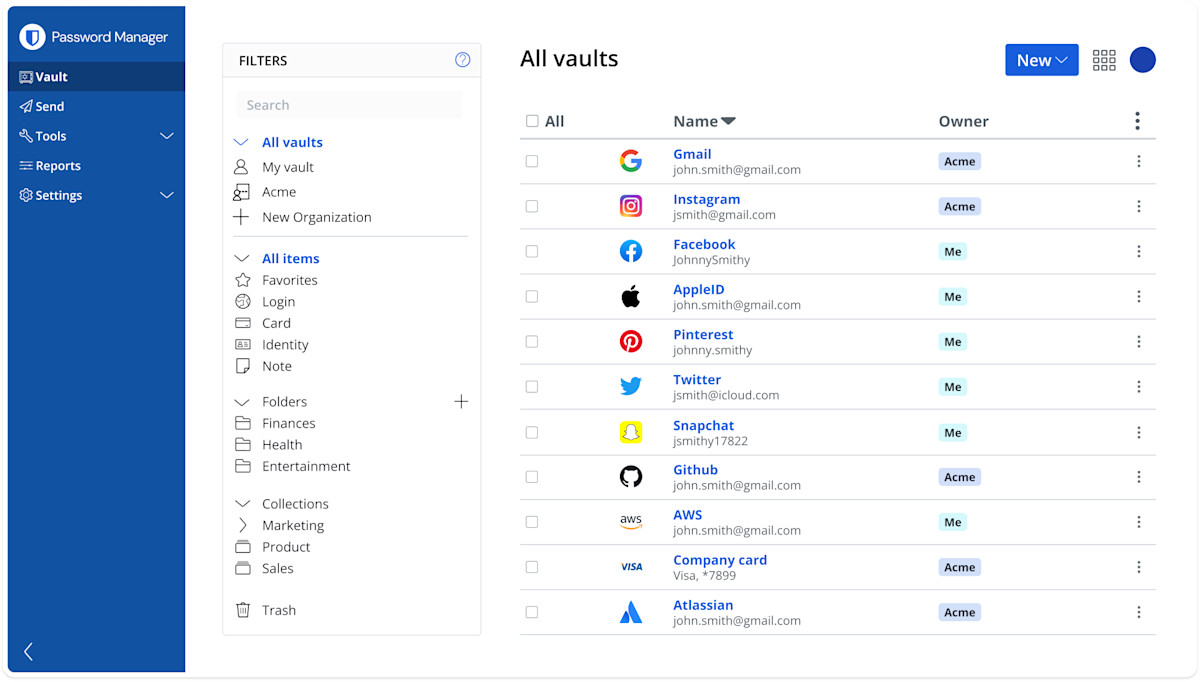
Once registration is complete, your account will be created and you can access the Bitwarden web application , which is the most comprehensive dashboard for managing all your data. Upon logging in, you'll see the "All Vaults" view, which lists all the items in your vault : logins, cards, identities, and secure notes.
If you belong to an organization, in addition to your personal vault, you'll see other shared vaults. On the left, you'll find the Filters, Favorites, and Folders column , which will allow you to keep your credentials organized as soon as you start saving things.
From here you can start working, but it's usually a good idea to create a minimal folder structure from the beginning (for example, Work, Personal, Banks, Social Networks) so you don't end up with a chaotic list of entries.
How to organize your vault: folders, items, and favorites
Within the web application, the key button to start adding information is the New button . From that menu, you can create folders, login items, cards, identities, or secure notes.
To create a folder, simply click New → Folder , type a clear name (for example, “Important Logins”), and save. Later, you can quickly assign items to that folder from a dropdown menu.
When adding a new login, select New → Item → LoginA form will open with several fields: a name to identify the entry (for example, "Gmail"), the username, the password, and the URI field where the access web address is indicated (something like https://accounts.google.com).
In the folder dropdown menu, you can choose the folder you previously created, and if you want to locate that login much faster, you can select the Favorites icon . This way, that item will appear in the Favorites section and you'll have it readily available without having to search through all the records.
Once you've filled in the required fields, click Save and your login will be stored in your vault. From there, you can use it from the browser extension, mobile apps, or the website itself to log in conveniently and securely.
Installing and configuring Bitwarden in the browser and on the desktop
Although the web version is very powerful, what truly makes Bitwarden convenient for everyday use is installing the browser extension . From the downloads section of the official website, you can choose your browser (Chrome, Edge, Firefox, etc.) and install the corresponding add-on.
The process is usually very similar: you go to the extension's page, click "Get" or "Add to browser," and confirm with "Add extension." After installation, the Bitwarden icon will appear in your browser toolbar , usually to the right of the address bar. If you don't see it, you may need to add it from the extensions menu (the puzzle piece icon).
The first time you click the icon, the extension will ask you to log in with your Bitwarden account (the one you just created). Enter your email and master password, and your safe will be available directly from your browser.
In addition to the extension, it's highly recommended to install the desktop application and the mobile app . Simply download the version for your operating system (Windows, macOS, Linux ) and, for mobile, from the iOS or Android app store. Once you log in with your account, all your passwords will automatically sync across all your devices.
With this you will have completed the “basic installation task”: your vault will be accessible and synchronized across the browser, mobile, web version and desktop program, without you having to do anything other than log in with your account when you need it.
Recommended Bitwarden extension settings for enhanced security
Before you start saving passwords willy-nilly, it's worth taking a few minutes to adjust the extension's settings . In the "Settings" tab, you'll find several sections for managing autofill, security, and some usage details.
In the MANAGE section , you'll find the AUTO-FILL options . A good practice is to disable autofill on page load, so Bitwarden doesn't automatically enter credentials without your explicit permission. Specifically, set "Auto-fill on page load" and "Default autofill settings for login items" to "Do not auto-fill on page load".
You can also adjust URI matching detection to "Host", so that the manager accurately matches each entry to the correct domain, reducing the risk of autocompletion on similar but not identical websites.
In the security settings , it's recommended to define a reasonable "Vault timeout," for example, 30 minutes, and select "Lock" as the timeout action. This way, after that period, the safe will lock and prompt you for the master password again, preventing it from remaining open indefinitely.
Options such as PIN unlock or biometrics can be left disabled if you prefer to prioritize maximum protection, although on personal and secure devices many users activate them to balance convenience and security.
In the “OTHER → Options → GENERAL” section, you can fine-tune useful details such as the clipboard clearing time (for example, 30 seconds after copying a password), automatic copying of TOTP codes, or whether you want Bitwarden to ask every time it detects a new login to save or update it.
Finally, in “DISPLAY” you can decide whether to display cards, identities, and other elements on the main tab, whether to show website icons, the countdown timer on the extension icon, or the visual theme. These are aesthetic details, but they contribute to a clearer and more user-friendly experience.
How to add and use passwords with Bitwarden
Once the extension and web app are configured, it's time to start saving credentials.
To manually add a login, the easiest way is to go to the page where you want to create or save the account (for example, Twitter or Spotify), open the extension, and click the "+" symbol to create a new login . Bitwarden will automatically fill in the URL (URI) field with the address of the page you are on.
You'll just need to fill in your username, password, and optional fields such as notes, folders, or custom fields (for example, the password creation date or whether the service has experienced security incidents). Then click "Save," and everything will be saved and synchronized.
The easiest way is simply to log in as you normally would . If your vault is unlocked, the extension will ask something like, "Do you want Bitwarden to save your data?" Accepting this will automatically create the entry without you having to fill out any forms.
The next time you visit that site, Bitwarden will detect your associated credentials. Clicking the extension icon will display the corresponding entry, allowing you to autofill the form fields . You can even use keyboard shortcuts , such as selecting the first field of the form and using combinations like "Ctrl + Shift + L" to fill it all in at once.
If you prefer, you can also choose to copy the username, password, or TOTP code individually from the entry, using the icons that appear next to each piece of data in the extension or on the web.
Using Bitwarden's secure password generator
Besides storing passwords, Bitwarden includes a powerful password generator that lets you forget about typical weak passwords like "Fido1234" that are broken in a snap with brute-force attacks.
To access the generator from the extension, simply open it and click on the "Generator" option at the bottom. A screen will open where you can choose the type of element to generate (password or passphrase), the length, and the character combination.
A fairly robust configuration is usually passwords of about 30 characters , including uppercase letters, lowercase letters, numbers and symbols, with a minimum of 1 number and 1 special character, and avoiding ambiguous characters if you want to reduce typing errors at some point.
Once generated, you can keep clicking the generate icon until you find a combination you like or that complies with the site's policy. Then, simply copy the password and paste it into the password change or registration form, and, if necessary, save it to Bitwarden using any of the methods explained earlier.
Cybersecurity studies like those by Hive Systems show that short, simple passwords last seconds against cracking attacks, while a good long password with a variety of characters can take hundreds or thousands of years to break with current resources, so it's always worth using a password generator.
Improve old logins: copy, change, and replace passwords
If you already have a lot of accounts with old passwords, a very useful use of Bitwarden is to gradually update them to strong passwords generated by the manager itself.
The typical process involves opening your safe, selecting the item you want to reinforce, and then, in another browser tab, accessing the corresponding website and logging in as usual. Once logged in, look for the section where you change your credentials , usually located under "Account," "Security," or "Login Settings."
Most websites will first ask for your current password . To do this, in Bitwarden you can click the copy icon next to the password field, return to the website, and paste it. It's advisable to get used to this copy-and-paste process with the password manager, as this is what you'll be doing from now on with your complex passwords.
When you reach the new password field, go back to Bitwarden, tap the Generate Password icon associated with that item, and confirm that you want to overwrite the current password. The value stored in your vault will become a very strong, random string, which you can then copy just like before.
Go back to the website and paste the new password into the corresponding fields (“New password” and “Confirm new password”), save the changes and you're done: the service will have a strong and up-to-date password, and Bitwarden will save it without you having to remember it.
If you have many accounts saved in your browser or other account managers, you can save time by using Bitwarden's import features , which allow you to import your data from Chrome, Firefox, other popular account managers, and even exported files. This way, you'll avoid spending a whole day copying and pasting.
Importing data and working with organizations in Bitwarden
Bitwarden greatly simplifies the transition from other environments because it allows you to import logins from browsers and password managers . Each source type has its own export format (CSV, JSON, etc.), and Bitwarden offers specific guides for each one.
Once your vault is well populated, you can consider taking advantage of the organizations feature , designed to share passwords and other vault elements with friends, family, work teams, or even an entire company.
You can create free organizations for two people , which is ideal for testing password sharing in a simple environment. From there, if it suits you, you can explore Bitwarden's various pricing plans designed for families, teams, or large organizations.
Additionally, if you want to go beyond the free personal account, there's a very affordable Premium subscription that adds extra features such as more 2FA options, security reports, and other advanced functions . To activate it, in your safe view you'll find options like "Go to Premium" where you can manage the payment.
Extra security: enable two-step login (2FA)
Along with a strong master password, two-step verification (2FA) is the most important measure to protect your Bitwarden account. The idea is that, in addition to your password, you'll need a second factor (usually a six-digit code on a different device).
Bitwarden supports several 2FA methods, but for free accounts, the most recommended method is to use a mobile authenticator app like Authy or Google Authenticator. These programs generate temporary codes that change every few seconds.
To set it up, open the Bitwarden web app and go to Settings → Security → Two-step verification . There you'll see several options; locate "Authentication App" and click "Manage." You'll be prompted to enter your master password to continue.
On your mobile device, open Authy, tap "Add account," and scan the QR code displayed on the Bitwarden website with your camera . The app will generate a six-digit code that you'll need to enter into the browser's dialog box and tap "Enable."
Once you've completed this step, return to the two-step login screen and tap "View recovery code." You'll need to re-enter your master password, and Bitwarden will then display a recovery code that you must keep safe . This code is how you regain access if you lose your phone or lose your two-factor authentication.
It's a good idea to print out that code and store it in a secure physical location , away from prying eyes and without relying on electronic devices that could break or be erased. This way, you minimize the possibility of being locked out of your own safe.
Bitwarden self-hosted on Windows Server with Docker
If you have more advanced knowledge and want complete control over the infrastructure, you can install Bitwarden on your own Windows server instead of using the official cloud. This deployment is based on Docker containers and requires that the server supports nested virtualization.
The general procedure involves several steps: configuring the domain and DNS records to point to your machine, opening ports 80 and 443, creating a user and directory exclusively for Bitwarden, installing and preparing Docker Desktop, obtaining an installation ID and key from the Bitwarden website, installing the stack with the PowerShell script , and finally, adjusting the environment variables and configuration file.
First, you must establish a domain name with its DNS records pointing to the server (for example, bitwarden.example.comand ensure that ports 80 (HTTP) and 443 (HTTPS) are accessible. Then, you will create a folder, for example C:\Bitwarden, and a specific local user to run the installation.
In Docker Desktop, you'll need to add that directory to the shared resources in the "File Sharing" section, apply the changes, and restart. After that, it's a good idea to log in to Windows with that user account before proceeding.
Bitwarden unfolds as a set of Docker containers orchestrated with Docker ComposeYou must install Docker Desktop for Windows, making sure to uncheck the option to use WSL2 instead of Hyper-V if you are going to work with nested virtualizationOnce ready, download the script to the folder you created. bitwarden.ps1 and you will run it from PowerShell.
During installation you will be asked for the domain name From the instance, if you want to use Let's Encrypt to generate a free SSL certificate (entering your email for expiration notifications), your Installation ID and your Installation Key obtained from the page https://bitwarden.com/hostAnd if you already have your own certificate or want a self-signed one created (valid only for testing).
After completing the wizard, you will need to edit the environment variables file located in \bwdata\env\global.override.envAt a minimum, you will need to configure the parameters of SMTP for sending emails verification and invitations, as well as adding at least one administrator address to adminSettings__admins to access the system administration portal.
When you save the changes, you'll apply the configuration with the appropriate script command, and if you need more advanced settings (for example, installations behind a proxy with alternative ports), you'll also adjust the archive config.yml and you will regenerate the installation assets before running the command Boot.
Once all the containers are in operation, you will be able to Open your domain in a browser and verify that the web safe responds correctly at the URL https://tu.dominio.comFrom there you can register accounts, log in and use Bitwarden as if it were the official cloud, but hosted on your own infrastructure.
Additionally, on Windows, you may need to configure a scheduled task to ensure that Docker Desktop starts when the server boots, even if no user is logged in via RDP. This task is created in Task Scheduler, assigned to the Bitwarden user, configured to run at startup with a short delay, and instructed to launch Docker Desktop automatically.
The installation script bitwarden.ps1 It also admits a series of commands (as -start, -stop, etc.) for manage the life cycle of the instance, which facilitates maintenance, updates, and troubleshooting.
With all these options, features and settings, Bitwarden becomes a central tool for managing your passwords , whether you're a beginner looking for browser convenience or an administrator wanting your own server with complete security control.

Passionate writer about the world of bytes and technology in general. I love sharing my knowledge through writing, and that's what I'll do on this blog, show you all the most interesting things about gadgets, software, hardware, tech trends, and more. My goal is to help you navigate the digital world in a simple and entertaining way.