- PowerShell allows you to install fonts for both the system and a specific user.
- Scripts can be used with AddFontResource and the Registry for a persistent installation.
- There are modern alternatives like installing fonts from Nerd Fonts to customize the terminal.
- It is possible to automate mass installation processes without having to be an administrator.

Have you ever encountered dozens of fonts that you need to install on your system? Windows and you don't want to do it one by one? Or would you like to automate the process to deploy it to multiple machines from one script or deployment? PowerShell, the powerful Windows management console, can help you do just that, whether you're an administrator or not.
In this article we teach you how to install fonts using PowerShell, covering everything from the most basic—such as copying files to the Fonts folder—to editing the Windows Registry to register the font as installed. We'll also explore how to automate this task in bulk, what to do if you don't have administrator privileges, and how you can customize PowerShell with tools like Oh My Posh and Fonts Nerd.
What do you need to know before installing fonts from PowerShell?
Windows manages installed fonts using two main mechanisms: the file system, through the %windir%\Fonts folder, and the Windows Registry, where an index is maintained that allows the system to detect and load fonts.
For a font to be correctly recognized by the system, it's not enough to just copy it to the Fonts folder; it also needs to be registered in the Registry. There are functions dedicated to this task, such as AddFontResource y AddFontResourceEx.
Temporary installation of fonts with PowerShell
If you only need one source to be available during the current session, you can temporarily charge it using AddFontResource. It is important to note that it will be deleted upon system reboot:
public static extern int AddFontResource(string lpszFilename);

$fuente = "C:\ruta\a\tu\fuente.ttf"
AddFontResource $fuente
This method is only valid while the session is active.If you want the font to remain installed after a system reboot, you need to perform a persistent installation.
Permanently installing fonts using PowerShell
For a persistent installation, you need to copy the source to the specific folder of the system (%windir%\Fonts) and then register its name in the Registry.
$fuente = "C:\ruta\a\tu\fuente.ttf"
$nombreFuente = "NombreFuente (TrueType)"
$destino = "$env:windir\Fonts\$(Split-Path $fuente -Leaf)"

Copy-Item $fuente -Destination $destino

New-ItemProperty -Path "HKLM:\SOFTWARE\Microsoft\Windows NT\CurrentVersion\Fonts" -Name $nombreFuente -PropertyType String -Value $(Split-Path $fuente -Leaf) -Force

::WriteInt32(::Zero, 0)
::WriteInt32(::Zero, 0)
After registering the font, it is advisable to send a change message to the system to have applications recognize the new font without restarting:
public static extern IntPtr SendMessage(IntPtr hWnd, int msg, IntPtr wParam, IntPtr lParam);
$WM_FONTCHANGE = 0x001D
$HWND_BROADCAST = 0xffff
SendMessage $HWND_BROADCAST $WM_FONTCHANGE ::Zero ::Zero
Automate bulk font installation from a folder
When you have many fonts to install, doing it one by one is not feasible.An alternative is to use scripts that automatically detect and process each file from a folder and its subfolders, such as .bat scripts.
A classic and still valid approach in PowerShell is to use a script that goes through all .ttf and .otf files, copies them, and registers them:
Get-ChildItem "C:\Fuentes" -Recurse -Include *.ttf, *.otf | ForEach-Object {
    $archivo = $_.FullName
    $nombre = $_.BaseName + " (TrueType)"
    $destino = "$env:windir\Fonts\$($_.Name)"

    Copy-Item $archivo -Destination $destino
    New-ItemProperty -Path "HKLM:\SOFTWARE\Microsoft\Windows NT\CurrentVersion\Fonts" -Name $nombre -PropertyType String -Value $_.Name -Force
}
For all this to work, PowerShell must be running with administrator privileges.Otherwise, it will fail to access the system registry or the Fonts folder.
Installing fonts without administrator privileges
In environments where you do not have administrator permissions, it's still possible to install fonts locally for the current user. Microsoft allows this since Windows 10 via the "Install for me only" option.
Additionally, you can use the environment variable $env:LOCALAPPDATA to copy fonts to the user's Fonts subfolder. While they won't be available for all apps, they'll work in most modern ones.
Some tools like regfont.exe allow you to register sources from the online commands even without elevated permissions: More info on managing add-ins in Office.
This approach makes installation easier in locked-down or policy-restrictive environments., such as schools or businesses.
Customizing PowerShell with Oh My Posh and Nerd Fonts
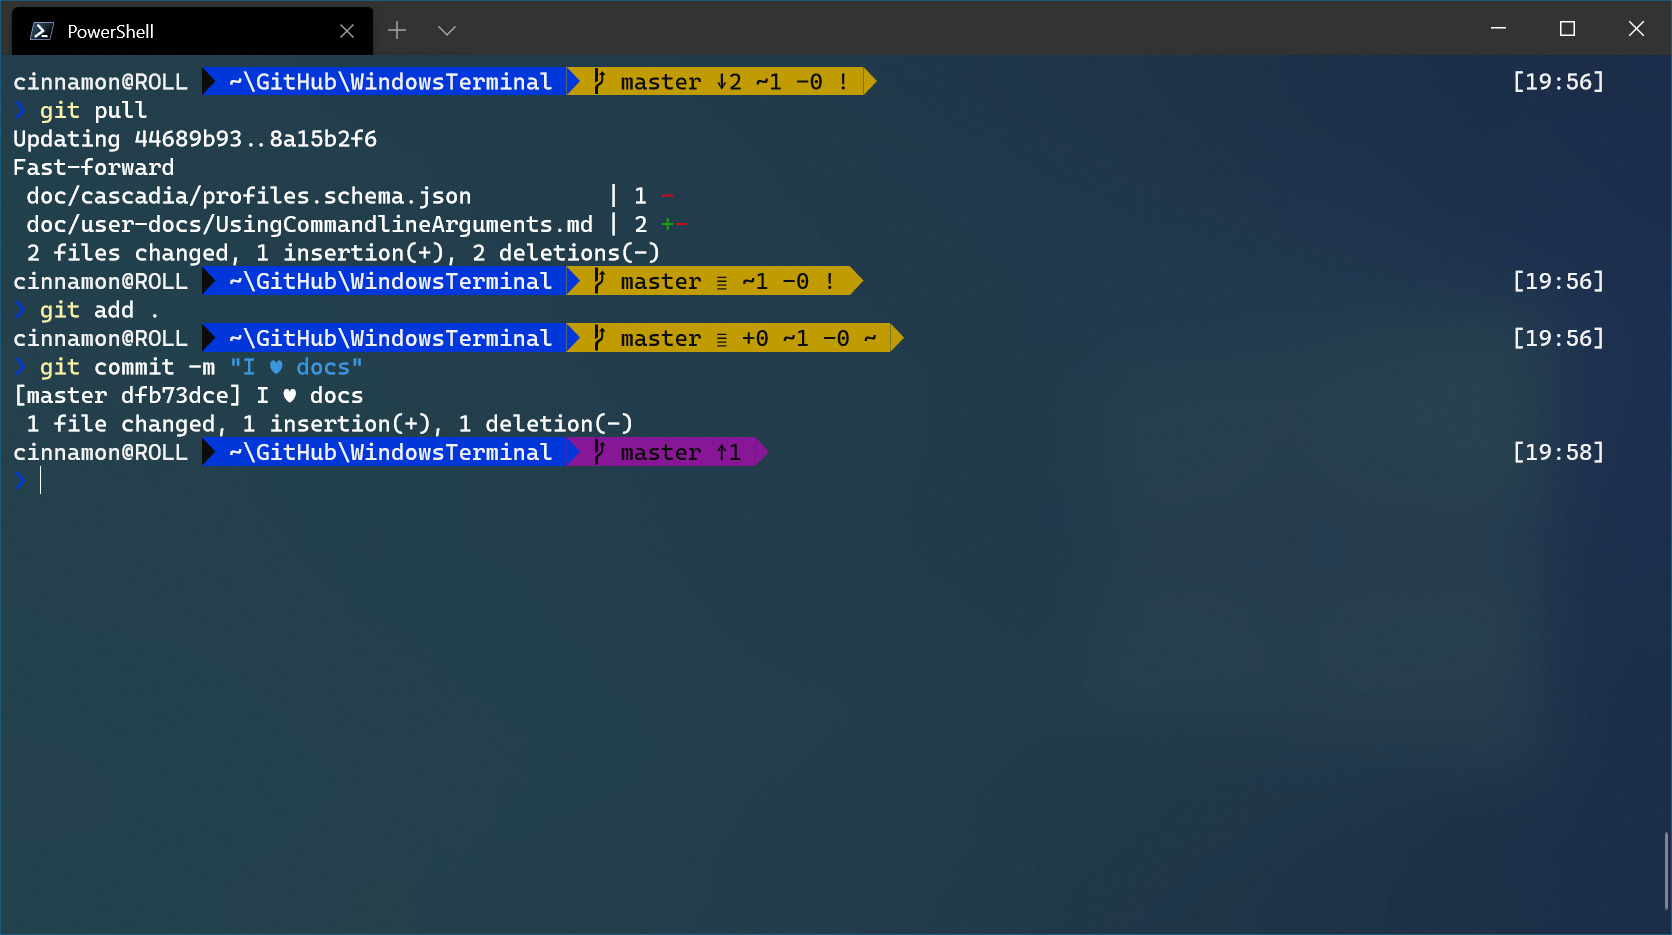
A growing trend is to customize the PowerShell console with more striking and functional visual styles.The Oh My Posh tool allows you to apply themes to your prompt and requires special fonts: Nerd Fonts.
These fonts include useful icons and glyphs that make the prompt more informative. To do this, you need to install fonts like MesloLGM Nerd Font, either for all users or just the current one.
Install a Nerd Font from PowerShell
It tienes WinGet configured, you can directly install a font: Guide to installing Kodi on Smart TV
winget install --id=Ryanoasis.NerdFonts.Meslo --scope=userNext, you'll need to configure your terminal or Visual Studio Code to use the new font as the default. To do this:
- Open Windows Terminal Settings (Ctrl + ,)
- edit the file
settings.json - add property
"font.face": "MesloLGM Nerd Font"within the desired profile
Edit the PowerShell profile to apply themes
PowerShell allows you to configure a profile that runs every time you open the console. To apply an Oh My Posh theme you must edit the file indicated by the variable $PROFILE and add an instruction like this:
oh-my-posh init pwsh --config "$env:POSH_THEMES_PATH\zash.omp.json" | Invoke-ExpressionThis will automatically apply your preferred theme every time you start PowerShell.
Troubleshooting character display errors in PowerShell
In some systems where languages such as Chinese, Japanese or Korean are used, the PowerShell console may have trouble displaying characters correctly. This issue is usually related to the default font.
One solution is to manually change the font used by PowerShell to a compatible one, such as MS Gothic, which you can do from the properties of the PowerShell window.
Extend your PowerShell environment with useful modules
In addition to installing fonts, you can further enhance your console experience with additional tools: to improve the PowerShell experience.
- PSReadLine: Improves command line editing with colors and auto-completion.
- Winfetch: Displays system information visually.
- Bat: alternative to cat, with syntax highlighting.
- calvary: Modern replacement for ls, with support for git and metadata.
Each of these modules can be easily installed from PowerShell and configured in your profile to enhance your daily workflow.
Installing fonts via PowerShell is not only possible, but also practical.From loading fonts temporarily to installing permanently, to customizing your console with visual tools, this technique covers a wide range of scenarios. Plus, with options to automate processes in bulk or without administrator permissions, it becomes an agile solution for both home users and business environments.
Passionate writer about the world of bytes and technology in general. I love sharing my knowledge through writing, and that's what I'll do on this blog, show you all the most interesting things about gadgets, software, hardware, tech trends, and more. My goal is to help you navigate the digital world in a simple and entertaining way.