- Configure GitHub Desktop in Windows This involves adjusting your Git identity, main branch, and integration with a GitHub or GitHub Enterprise account.
- The application allows you to create, add, and clone repositories, as well as manage branches, commits, and synchronization with the remote without using the command line. commands.
- GitHub Desktop integrates collaboration features such as issues and pull requests, facilitating teamwork and change review.
- Choosing the right editor, theme, and connection method (HTTPS or SSH) improves the daily experience and the security of the development environment.

If you program on Windows and want to maintain serious control over your code, sooner or later you'll need to configure Git and GitHub Desktop correctly . Simply installing the applications isn't enough: you need to properly configure the name, email address, branches, how to connect to GitHub, and a few other details to ensure everything runs smoothly.
Throughout this guide you will see, step by step and without unnecessary technical jargon, how to install Git and GitHub Desktop on Windows , how to authenticate with your GitHub or GitHub Enterprise account, how to configure your identity as an author, choose the editor, the application theme, and how to start working with repositories, branches and synchronization without hardly touching the command line.
What is GitHub Desktop and why is it worth it on Windows?
GitHub Desktop is a free and open-source application that serves as a graphical client for Git. Instead of struggling with commands in a terminal , you can commit changes, create branches, push and pull commits, or clone repositories using a user-friendly visual interface—ideal if you work on Windows and prefer something more clickable.
With GitHub Desktop, you can work with repositories hosted on GitHub as well as other services that use Git as their version control system. The tool handles the execution of Git commands behind the scenes, while you manage the application with simple buttons, menus, and keyboard shortcuts.
The program is designed so that you can collaborate on projects in a way very similar to how you would on the GitHub website: view and create pull requests, review changes, open issues, and keep your branches synchronized with remote repositories without having to open a terminal for each operation.
Furthermore, GitHub Desktop is a very active open-source project, with its code hosted in the GitHub desktop/desktop repository . From there you can review the project's progress, propose new features, or report bugs if you'd like to participate in its development.
To get the most out of it, it helps a lot to know the basics of Git and GitHub (commits, branches, remote repositories, pull requests, etc.). You don't have to be an expert, but understanding these concepts will make what you see in the GitHub Desktop interface much more meaningful from day one.
Requirements and options for using Git and GitHub on Windows
Before you start installing anything, it's a good idea to check that your system meets the minimum requirements for GitHub Desktop . The application works on 64-bit Windows systems starting with Windows 7 , which in practice covers almost any current computer, as long as it's not a 32-bit installation.
If you're only interested in using Git from the terminal, you can always install Git for Windows as a command-line tool and forget about the graphical client. However, for beginners or those who prefer a more visual interface, GitHub Desktop significantly simplifies the learning curve and many common workflows.
You also have the option of installing GitHub CLI (gh) , the official command-line utility for working with GitHub without opening your browser. This tool complements Git and GitHub Desktop very well, but it's not essential for setting up the basic environment on Windows.
If, on the other hand, you don't need to manipulate files locally, GitHub allows you to perform many actions directly in your browser: create and edit files, manage repositories, open issues, merge pull requests, and more. Even so, working locally with Git and GitHub Desktop offers backups, detailed version control , and the ability to develop offline.
In short, on Windows you can combine several tools: Git for the command line, GitHub Desktop for the graphical interface, and GitHub CLI if you prefer automating from the terminal. This guide focuses primarily on GitHub Desktop and how to integrate it with Git and your GitHub account.
Install GitHub Desktop on Windows step by step
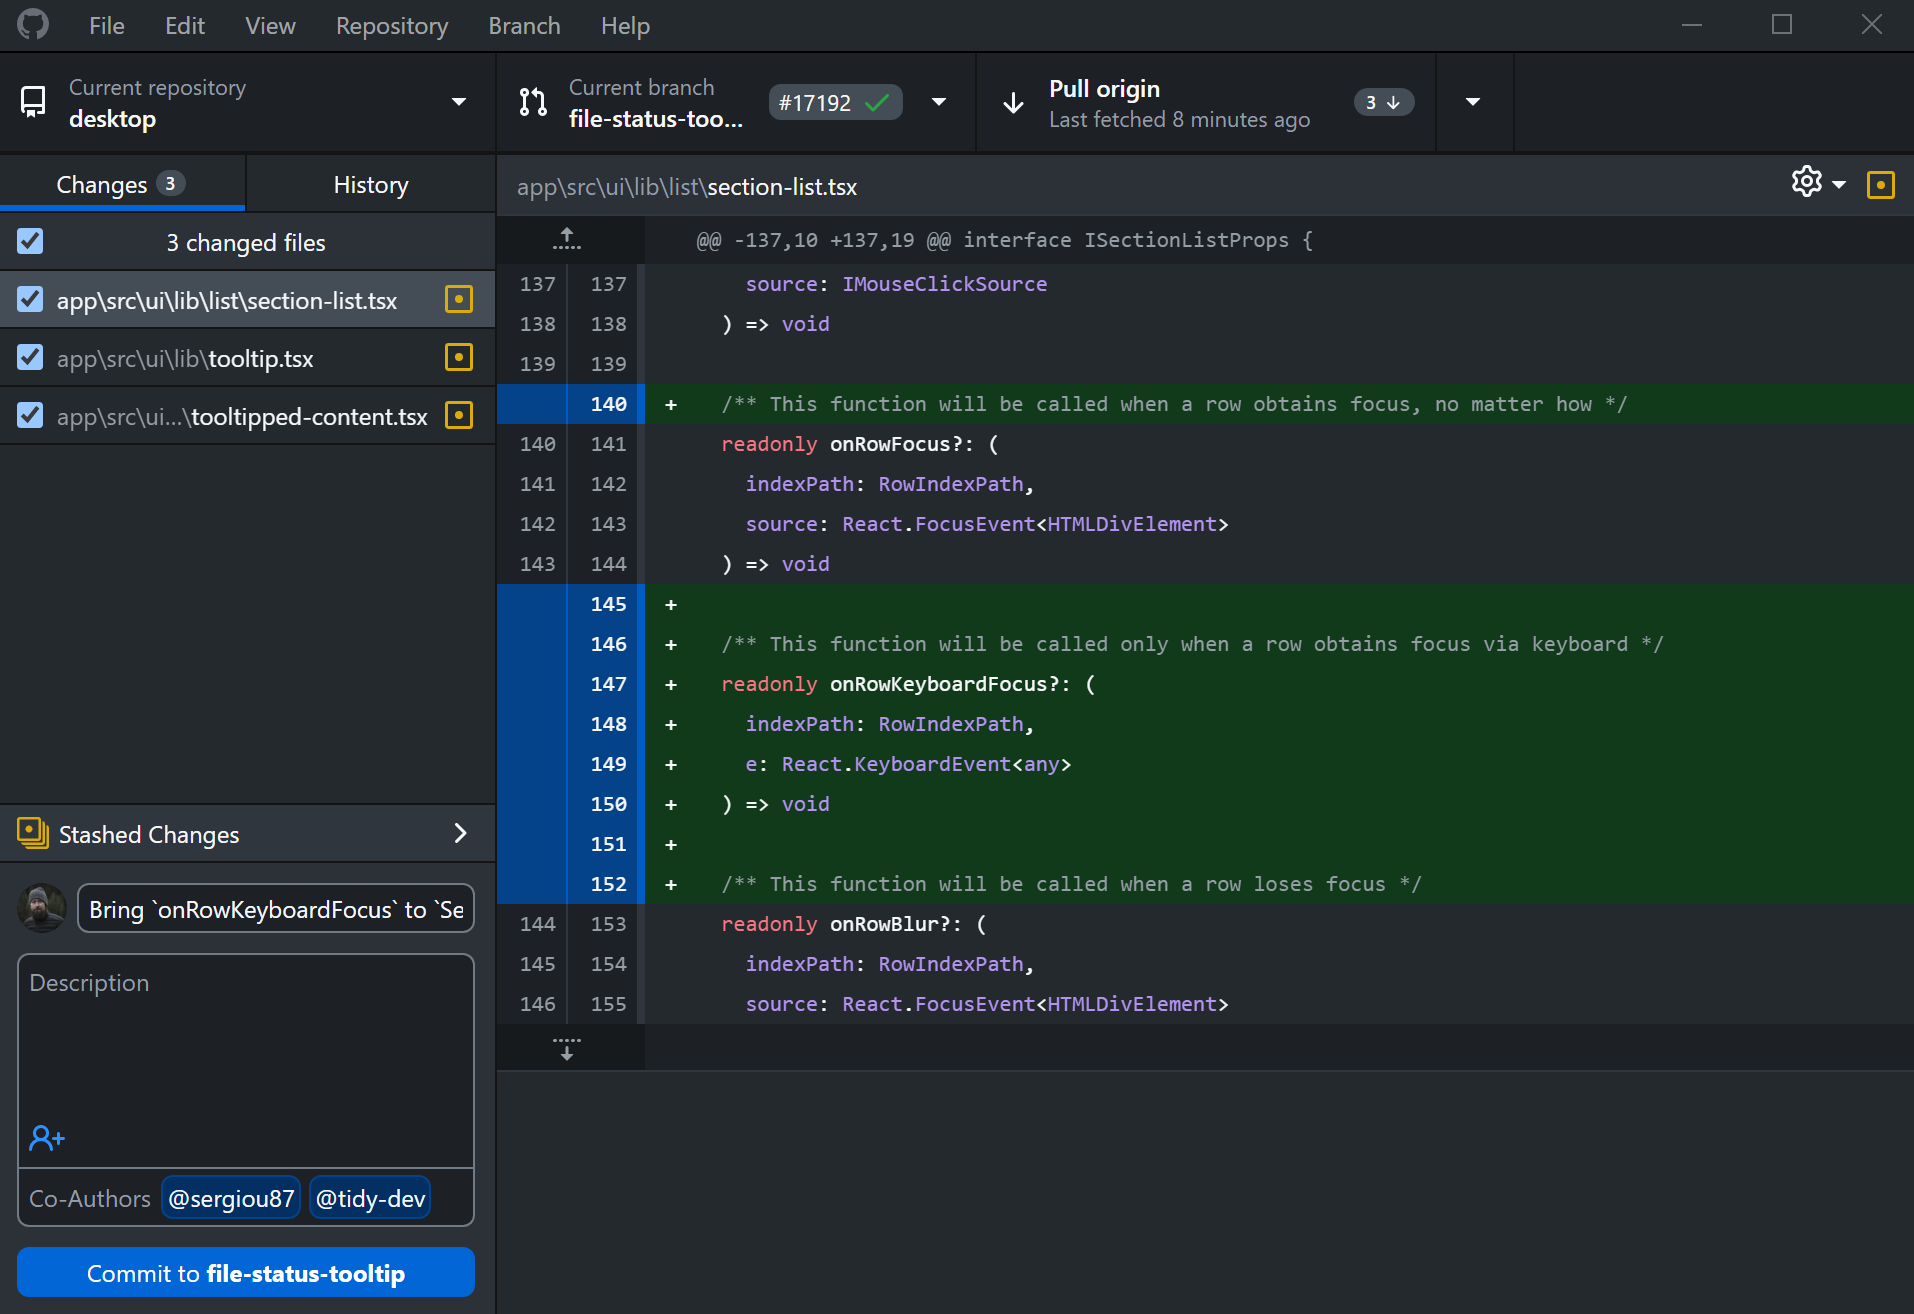
Installing GitHub Desktop on Windows is quite straightforward; you don't need to be a command-line expert to have it up and running in just a few minutes. The process is very similar to installing any other typical program on Windows.
First, open your favorite browser and go to the official GitHub Desktop download page , available at https://desktop.github.com/. The site will then detect that you are using Windows and provide a button to download the 64-bit version.
Once you click the download button, the installation file will usually be saved in your user's "Downloads" folder . As soon as the download is complete, simply locate the file and double-click it to launch the automatic installer.
The GitHub Desktop installation wizard requires minimal interaction: the tool installs itself on your system, and once the process is complete, the application will open automatically . You don't have to struggle with advanced settings or unusual paths during this initial step.
At this point, if you don't already have Git installed separately, you can follow a specific tutorial later on to install Git from the command line . GitHub Desktop integrates with your local Git configuration and, in many cases, will automatically detect the options you already have defined on your computer.
After the first run of GitHub Desktop you will see a wizard that guides you to log in or create an account and to adjust some basic preferences such as the identity of the commit author or the name of the main branch.
Create and connect your GitHub or GitHub Enterprise account
To use GitHub Desktop to sync your projects with the cloud, you need a GitHub or GitHub Enterprise account . If you already have one, the integration is seamless; if not, the setup wizard will guide you through the process.
If you don't already have a user account, the first step is to go to the GitHub website and create a new one , choosing a username, email address, password, and other basic information. You will use this same username on the website, in GitHub Desktop, and in other clients.
Once you have your account, you need to authenticate GitHub Desktop with GitHub . From the application, when you choose the login option, your browser will automatically open, taking you to the official GitHub login page, where you will need to enter your credentials.
After logging in, GitHub will display a screen to authorize GitHub Desktop to access your account and repositories. To continue, simply click the "Authorize desktop" button , allowing the application to clone, create, and update repositories on your behalf.
When you return to GitHub Desktop, the wizard will ask you to confirm some information, such as the account name and email address that will be used in your commits. You can accept the values imported from GitHub or modify them if you need to use them differently on your local machine.
When you click on “Finish”, you will have completed the login process and you will see the main GitHub Desktop interface , ready to start working with your local and remote repositories.
Setting up Git within GitHub Desktop on Windows
GitHub Desktop relies on your local Git configuration , but also lets you adjust some key parameters directly from the application. This includes your name, email address, and the default parent branch for new repositories.
First, you can define the global name and email address that will be associated with commits across all your repositories by default. If you already have this information configured globally with Git, GitHub Desktop will detect and use it automatically upon startup.
Setting the global author information in GitHub Desktop updates the same values in Git's global configuration . This means that when you create new local repositories from the application, that identity will be used by default to sign all your commits, unless you override it for a specific project.
If you ever need to work with different identities, GitHub Desktop also lets you set a different name and email address for each repository . This is very useful, for example, when you want to use your work email for professional projects and keep your personal email for public or experimental repositories.
When you define a specific author within a repository, the application modifies the local Git configuration in that project , overriding the global settings for that repository only. The rest of your repositories will continue to use the global identity you defined in GitHub Desktop or in Git.
An important point to note is that if the email address you're using in Git doesn't match any of the email addresses associated with your GitHub account , GitHub Desktop will display a warning before you commit the changes. This helps prevent commits from appearing without being properly linked to your GitHub user.
Another key setting is the default main branch name for new repositories you create from GitHub Desktop. The application uses “main” as the default, in line with modern GitHub configurations, but you can change this if you need to use a different standard name within your organization.
Basic settings: editor, theme, and useful preferences
In addition to Git's identity, GitHub Desktop offers several options to adapt the application to your workflow . Among the most practical settings are the choice of text editor and customization of the visual theme.
One of the advantages of GitHub Desktop is that it lets you open your favorite text editor or IDE directly from the application to edit files or review code. It supports numerous editors and environments, both lightweight and more powerful, as long as they are installed on your system.
From the settings menu, you can select the default editor to use when you choose to open the project from GitHub Desktop. This greatly streamlines your workflow, as you don't have to manually navigate to the repository folder every time you want to make a change.
In terms of visual appearance, GitHub Desktop includes several themes to change the interface's look . For example, you can choose a light theme, a dark theme, or let the application automatically adapt to the Windows operating system's theme settings.
Choosing a comfortable theme for you isn't just about aesthetics: if you spend many hours in front of the screen, it can help reduce eye strain and make reading diffs and changelogs more enjoyable, especially during long code review sessions.
Connect your repositories to GitHub: HTTPS and SSH
Once you have Git and GitHub Desktop set up, you need to decide how you're going to connect to your remote repositories on GitHub : via HTTPS or using SSH keys. Both options are secure, but each has its own characteristics.
Connecting via HTTPS is the recommended option for most users , especially if you're just starting out. When you clone a repository using HTTPS, Git can cache your GitHub credentials using a credentials wizard, so you don't have to enter your username and password each time.
If you choose this method, GitHub Desktop and Git will handle the credentials , and you'll only need to authenticate when necessary. It's a very convenient and secure workflow for the vast majority of Windows work environments.
The alternative is to use SSH as the connection method . In this case, instead of user credentials, public-private key pairs are used. You'll need to generate an SSH key on each computer from which you want to push or pull, and then add the corresponding public key to your GitHub account.
Working with SSH is especially practical if you manage multiple teams or automations and don't want to be asked for your password frequently. However, it does require a bit more initial setup: generating the key, registering the public key on GitHub, and ensuring that the SSH agent loads it correctly onto your system.
Once the connection is set up (either via HTTPS or SSH), your Git and GitHub Desktop environment is ready to create and clone repositories, share code, and collaborate with others . From this point, the truly productive part of working with version control can begin.
Create, add, and clone repositories with GitHub Desktop
With the app installed and your account connected, the next logical step is to start working with repositories . GitHub Desktop facilitates three basic actions: creating a new repo, adding one you already have on your computer, or cloning one from GitHub.
If you want to start a project from scratch, you can use the "File" menu option and select "New repository…" . This opens a wizard where you choose the destination folder on your disk, the project name, and some basic details. When finished, your local repository will be ready, and if you wish, you can publish it later on GitHub.
You can also tell GitHub Desktop to start managing an existing repository on your computer . To do this, use the "Add local repository..." option from the "File" menu and select the project folder that already has an initialized Git repository.
Finally, if you want to import a project from GitHub to your machine, you'll use the "Clone repository..." option . The application will show you the repositories in your account and the organizations you belong to, and will also allow you to manually enter the URL of any repository you have access to.
Creating a new repository, forking an existing one, or cloning a popular project gives you the ability to back up your code to GitHub and share it with the rest of the world or just with your team, depending on how you configure the repository's visibility.
Working with branches, changes, and commits from the interface
Once your repository is open in GitHub Desktop, the usual workflow involves creating branches, modifying files, reviewing changes, and confirming commits conveniently from the graphical interface, without typing commands.
Branches are used to isolate your development work, allowing you to test new features or bug fixes without affecting the main branch until everything is ready. From GitHub Desktop, you can create a new branch from the current one, give it a descriptive name, and start working immediately.
When you edit files in your text editor or IDE, GitHub Desktop will detect the changes and show you a list of pending changes in the corresponding tab . There you'll see which files have been modified, added, or deleted, and you can review the diffs line by line.
Before committing, you can select which files or parts of the changes you want to include and write a clear and concise commit message describing what you've done. A good commit history saves you a lot of headaches when debugging or reviewing a project's progress.
After confirming the changes, you'll have new commits in your local branch. When you want to share them with your remote repository on GitHub or access them from another computer, simply use the option to push the changes to GitHub from within the application.
Collaboration: issues, pull requests, and change review
GitHub Desktop is not limited to managing commits: it is also a very useful tool for collaborating with other developers on shared projects, integrating the issues and pull requests experience you already know from the GitHub website.
From within the application, you can create issue reports to record errors, ideas, or pending tasks. These issues serve as a starting point for discussing changes and planning improvements, keeping all the context within the corresponding repository.
When you have a branch with changes you want to propose to the main project, you can use GitHub Desktop to open a pull request . This pull request will allow the rest of the team to review your code, comment on specific parts, and, if necessary, merge it into the main branch.
The application allows you to view both your own pull requests and those of your collaborators, showing the set of proposed changes and the review status . From there, you can open the project in your editor to make further modifications if you see anything that needs adjusting.
By integrating issues and PRs into your daily workflow, GitHub Desktop becomes a convenient control center for managing the lifecycle of your changes , from the initial idea to its final merge into the remote repository, including intermediate revisions.
Keep the local repository synchronized with the remote one
In active projects, it's essential to keep your local copy up-to-date with the version on GitHub. GitHub Desktop simplifies this task by helping you synchronize branches between your local and remote repositories using push and pull operations.
When you commit on your machine, those changes only exist in your local repository until you push them to the remote repository . The application visually shows whether your branch is ahead of, behind, or out of sync with what's on GitHub.
Similarly, if other team members have pushed changes to the same branch on the remote server, you'll need to run a pull command to bring those commits to your local copy . GitHub Desktop handles running the appropriate command internally and showing you the update result.
In case conflicts arise when merging changes (for example, because two people have edited the same line of a file), the tool will help you locate and resolve the conflicts , usually by using your text editor or a built-in or external visual comparator.
Regularly using synchronization options ensures that your local branch accurately reflects the project's state on GitHub, preventing surprises when opening pull requests or deploying changes to production environments.
With all of the above properly configured—Git and GitHub Desktop installed, your account authenticated, author identity, main branch, preferred editor, HTTPS or SSH connection method, and a clear workflow for creating repositories, branches, and synchronizing changes—you'll have a solid environment on Windows for versioning your code, collaborating with others, and keeping your projects organized with much less friction than is typically associated with Git on the command line.

Passionate writer about the world of bytes and technology in general. I love sharing my knowledge through writing, and that's what I'll do on this blog, show you all the most interesting things about gadgets, software, hardware, tech trends, and more. My goal is to help you navigate the digital world in a simple and entertaining way.